Kafka in the Cloud: Why it’s 10x better with Confluent | Find out more
Getting Started with Spring Cloud Data Flow and Confluent Cloud
Data is the currency of competitive advantage in today’s digital age. All organizations struggle with their data due to the sheer variety of data types and ways that it can be shaped, packaged, and evaluated.
Within organizations, teams use different tools, fragmented rule sets, and multiple sources to find value within the data. These operational differences lead to divergent definitions of data and a siloed understanding of the ecosystem.
These challenges have led to the rise of several new technologies, including Apache Kafka® and Spring Cloud Data Flow. These help transform data ownership responsibilities and, at the same time, prepare them for the transition from batch to real-time data processing. Drawing insights as data is created versus looking at it as a past event provides a critical view into the operation of your business at many levels. Event streaming enables you to perform everything from responding to inventory issues, to learning about business issues before they become issues.
This blog post gives you the foundation for event streaming and designing and implementing real-time patterns. Using Confluent Schema Registry, ksqlDB, and fully managed Apache Kafka as a service, you can experience clean, seamless integrations with your existing cloud provider.
What follows is a step-by-step tutorial of how to use these tools and lessons learned along the way. Follow this walkthrough to configure Confluent Cloud and Spring Cloud Data Flow for development, implementation, and deployment of cloud-native data processing applications.
By the end of this tutorial, you should have the knowledge and tools to set up Confluent Cloud and Spring Cloud Data Flow and understand the power of event-based processing in the enterprise landscape. The tutorial also reviews the basics of event stream development and breaks down monolithic data processing programs into bite-size components.
Prerequisites
- An understanding of Java programming and Spring Boot application development
- Knowledge of Docker and Docker Compose
- An understanding of Kafka or publish/subscribe messaging applications
- Java 8 or 11 installed
- Docker installed with 8 GB memory to daemon
- An IDE or your favorite text editor (including Vim/Emacs)
Spring Cloud Data Flow and Confluent Cloud architecture
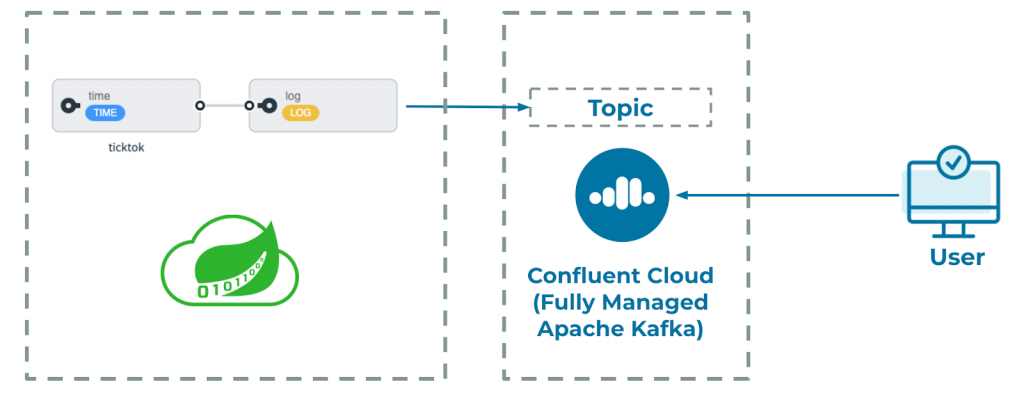
| ℹ️ | Note: All of the following instructions, screenshots, and command examples are based on a Mac Pro running macOS Catalina with 16 GB of RAM. It is not recommended to deploy Spring Cloud Data Flow locally with any less than 16 GB of RAM, as the setup takes a significant amount of resources. |
Acquiring the Docker Image of Spring Cloud Data Flow
Cloud Data Flow and how easy it is to launch a stream that uses Kafka as its messaging broker. This walkthrough familiarizes you with the paradigms and patterns used in enterprise-ready event streaming and shows you the details for administering Data Flow and Confluent Cloud.
Start by navigating to the Spring Cloud Data Flow microsite for instructions on local installation using Docker Compose. Follow the instructions to download the Docker Compose file. Be sure to put this file in a location that you can remember.
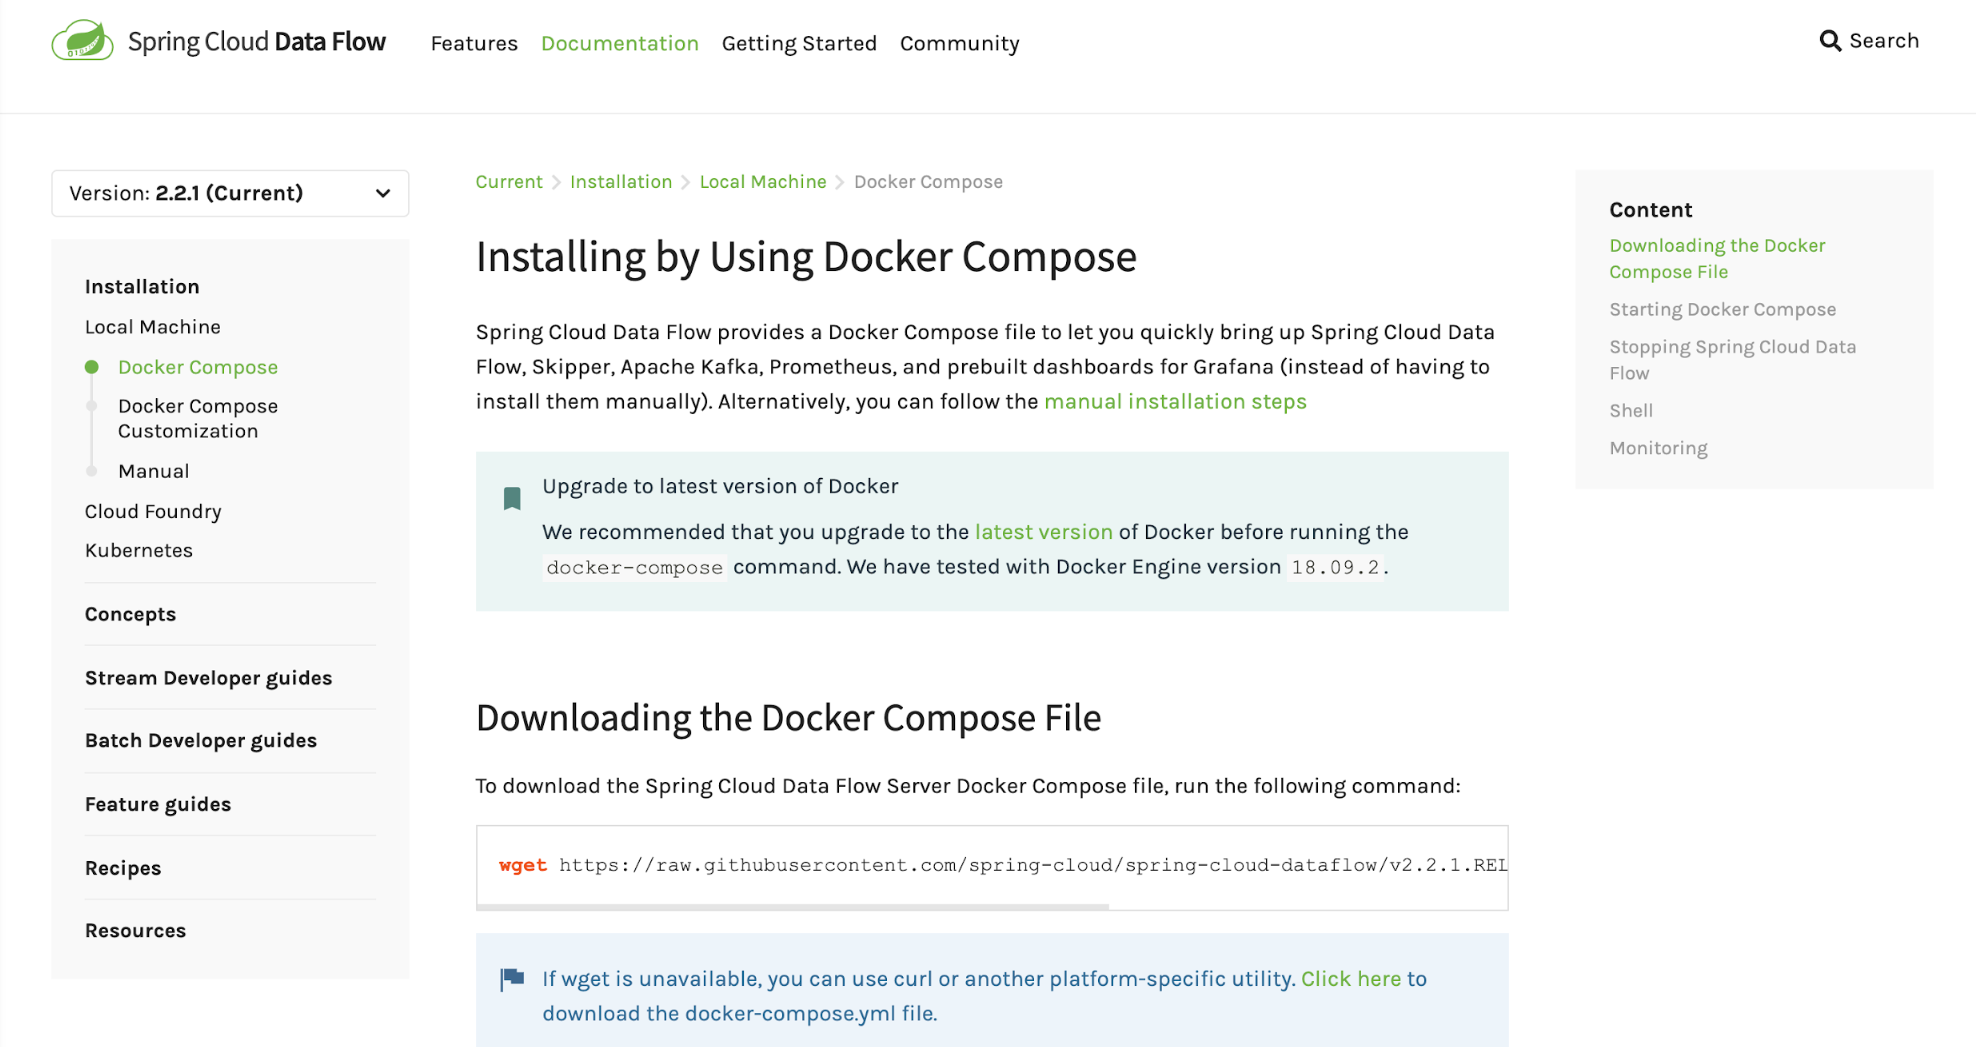
For example, you could use a workspace folder on your computer and navigate to that directory to make a new folder called dataflow-docker. Then navigate to that directory and download the docker-compose.yml file.
cd ~/workspace/
mkdir dataflow-docker
cd dataflow-docker
wget -O docker-compose.yml https://raw.githubusercontent.com/spring-cloud/spring-cloud-dataflow/v2.6.3/spring-cloud-dataflow-server/docker-compose.yml
The Docker setup in this file allows for dynamic decisions as to which versions of the Data Flow server and the Skipper server are part of the deployment. The Data Flow server manages the UI, authentication, and auditing, while the Skipper server manages the deployment lifecycle of data processing jobs and the containers that they run in. The Data Flow site instructs you on what versions to use and how to set the variables. As of this writing, it is 2.6.3 for the Spring Cloud Data Flow server and 2.5.2. for the Skipper server.
Starting the Spring Cloud Data Flow service
Now that you know what environment variables to set, you can launch the service. Start the service up with the detach flag -d and review the components that are created:
export DATAFLOW_VERSION=2.6.3
export SKIPPER_VERSION=2.5.2
docker-compose up -d

Several services are created that work together to provide you with the Spring Cloud Data Flow experience. The key parts are as follows:
- Skipper: The server that manages Spring Cloud Data Flow Stream lifecycles, messaging layer bindings, and container deployment
- Dataflow-server: The server that provides the UI, Spring Cloud Data Flow Stream Composer, and all user access controls
- Dataflow-app-import: This is a one-run process that imports the initial sample applications in bulk
- Dataflow-mysql: This is the application database
- Dataflow-kafka[-zookeeper]: These are the local implementations of Kafka and its authentication manager, which provide a quick start for exploration
For this exercise, the local Kafka installation is used so that you can get familiar with how the Kafka binder works. Then migrate this to Confluent Cloud to see how to migrate your own local workloads to the cloud.
You can review the architecture of Spring Cloud Data Flow to get a deeper understanding of how it all works together.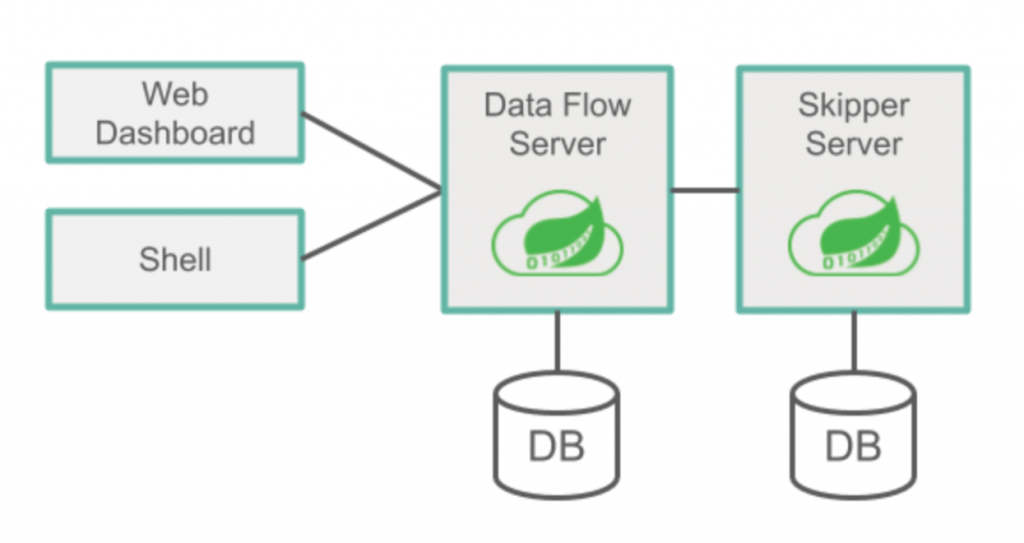 Source: Spring Cloud Data Flow
You can now launch the Spring Cloud Data Flow UI, which should be located at http://localhost:9393/dashboard. Spring Cloud Data Flow will successfully start with many applications automatically imported for you. These applications were downloaded during the Spring Cloud Data Flow startup and are all configured to use the Spring for Apache Kafka connector.
This connector works with locally installed Kafka or Confluent Cloud.

Deploying a Kafka-based stream
The following tests out the creation of a Data Flow Stream using the built-in applications. The applications that come preinstalled with Spring Cloud Data Flow are set up to utilize the Apache Kafka binder and work out of the box with the setup.
Test your setup using an example stream called ticktock. This uses the preregistered Time and Log applications and results in a message of the current time being sent to the stdout of the Log application every second.
To build this stream, navigate to the “Streams” definition page and click Create Stream(s).
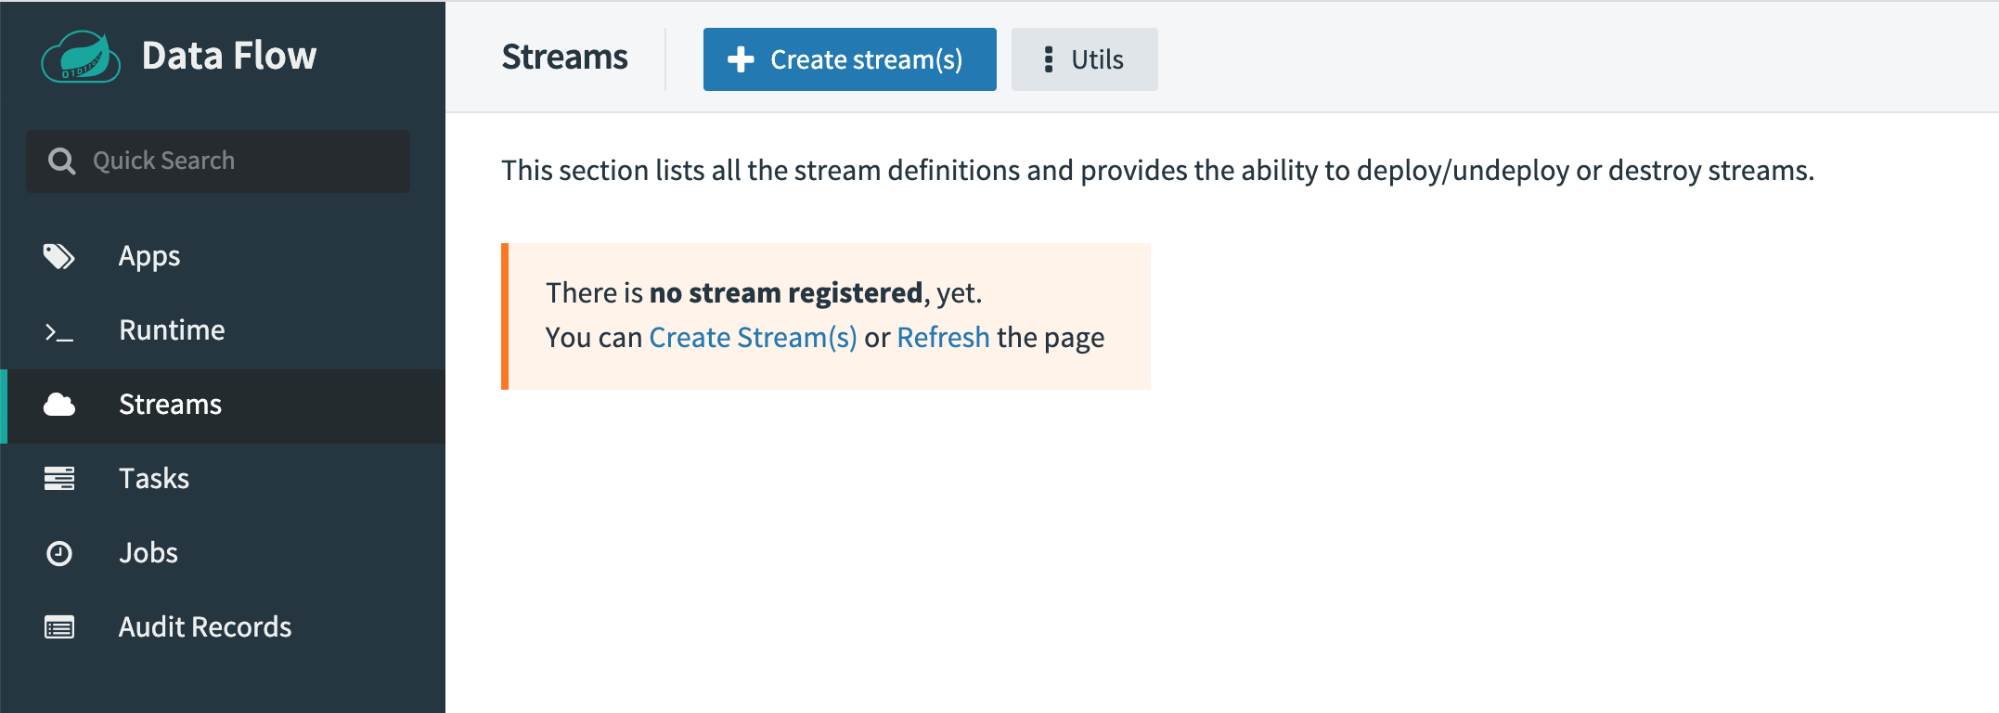
Spring Cloud Data Flow provides a text-based stream definition language known as the Stream DSL. You can use either the Stream DSL window or the drag-and-drop visual editor below to design your stream definition. This exercise uses the visual editor. In this screen, you can also see a list of all registered applications grouped by type. From this section select time and log applications, dragging both onto the composition pane on the right. Your composition pane should look like the one below:
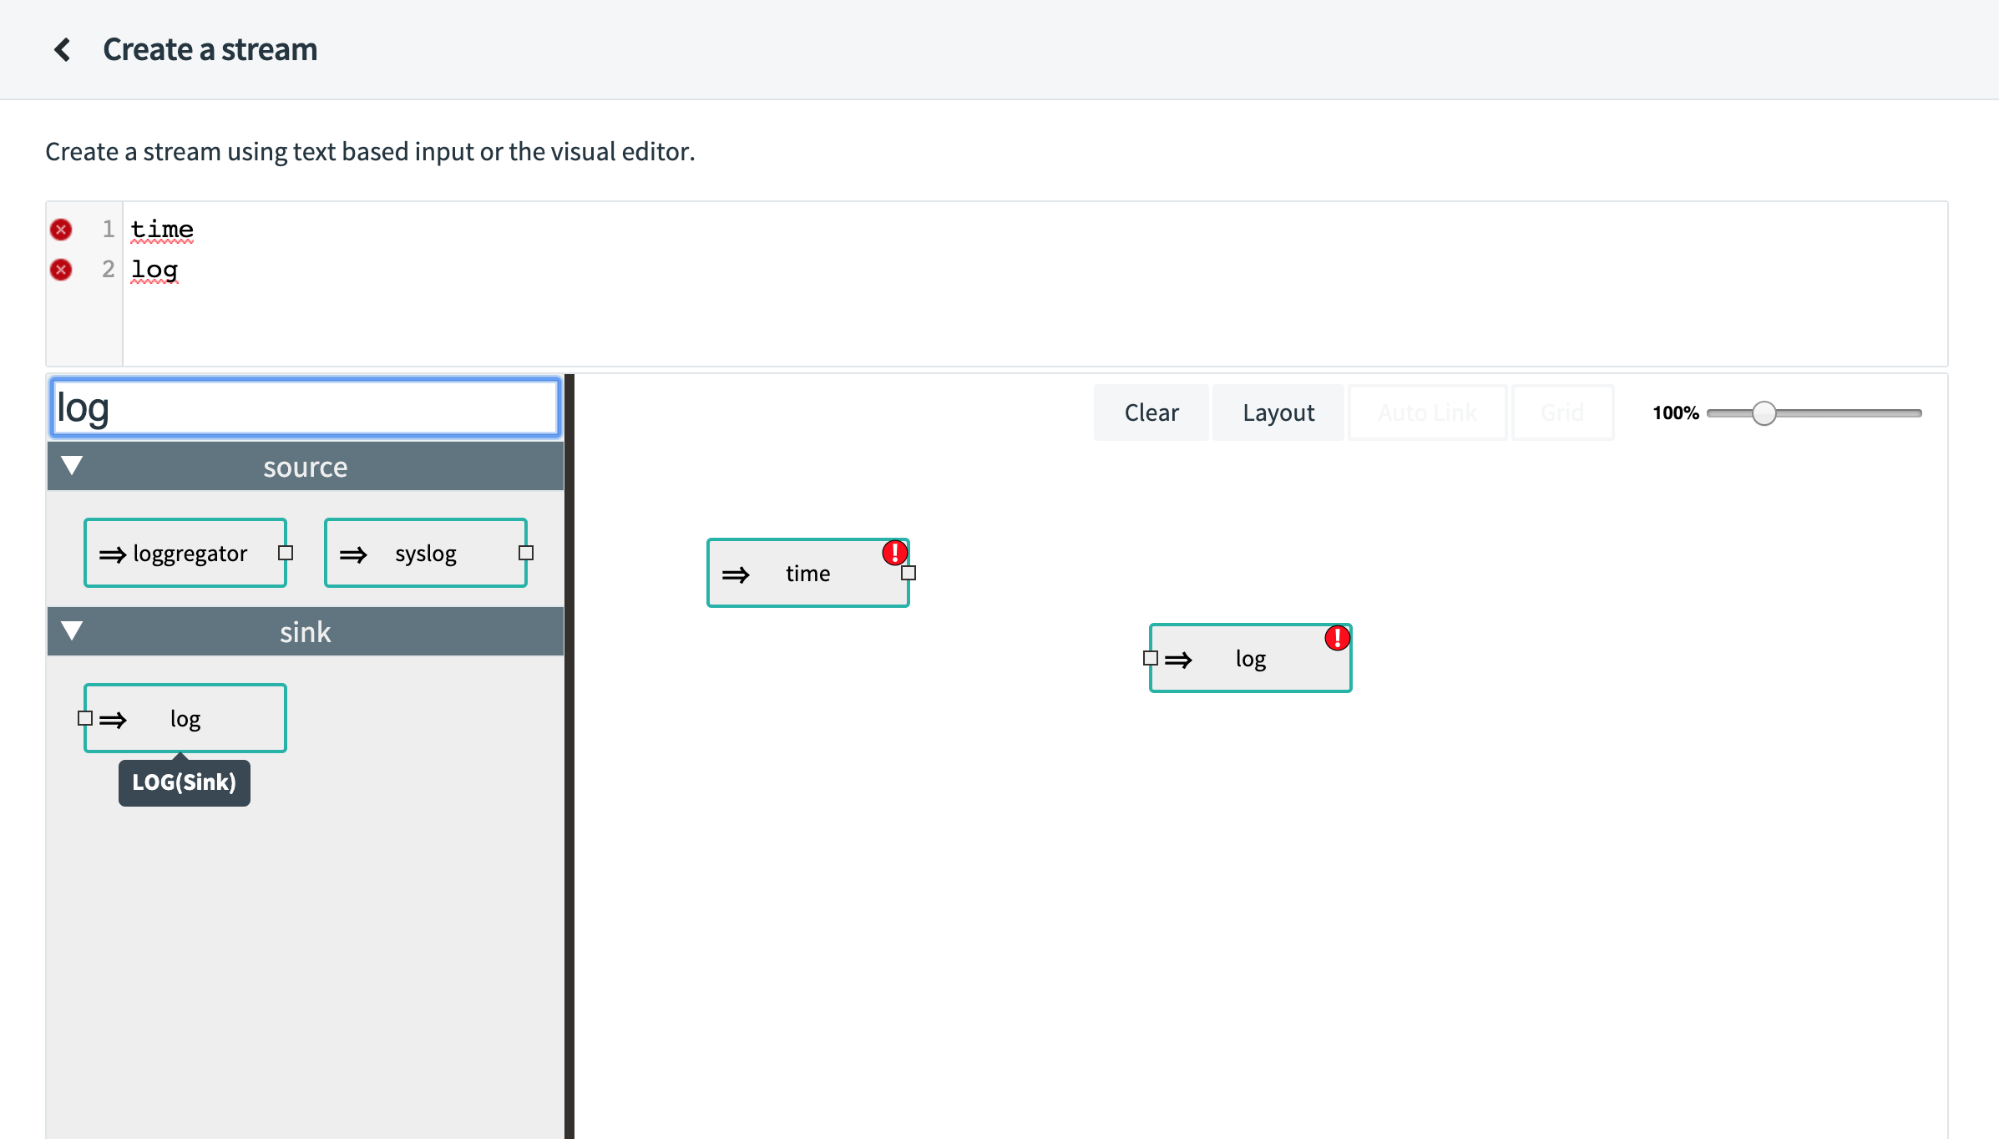
You may have noticed that as you modified the contents of the visual editor pane, the Stream DSL text for the current definition updates. This works both ways—if you input the Stream DSL, you get a visual representation. The ability to reproduce stream definitions comes in handy in the future as you can develop it with the UI and copy the Stream DSL for later use.
At this point, you have two applications that are going to be part of your stream, and the next step is to connect them via a messaging middleware. One of the key pieces of this solution is that the connection of applications, management of consumer groups, and creation/destruction of topics and queues is managed by the Data Flow application. Constructing your applications in this way allows you to think logically about your flow of messages and not worry so much about the amount of topics you need, partitions, or anything else.
Source applications that generate data have an output port: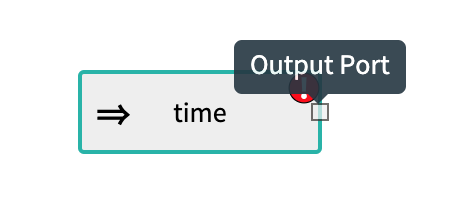 Sink applications that consume data have an input port:
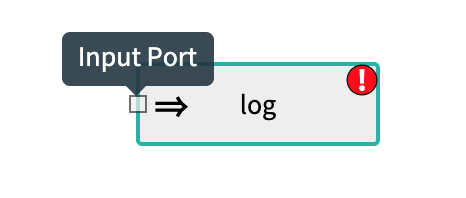 Processor applications have both an input and an output port.
You connect applications in Spring Cloud Data Flow by dragging a line between their ports or by adding the pipe character “|” to the Stream DSL definition. Remember that the changes between the text and visual editor are synced.

Finish creating this stream by clicking the Create Stream button at the bottom and give it a name in the dialog that shows. This example uses ticktock.
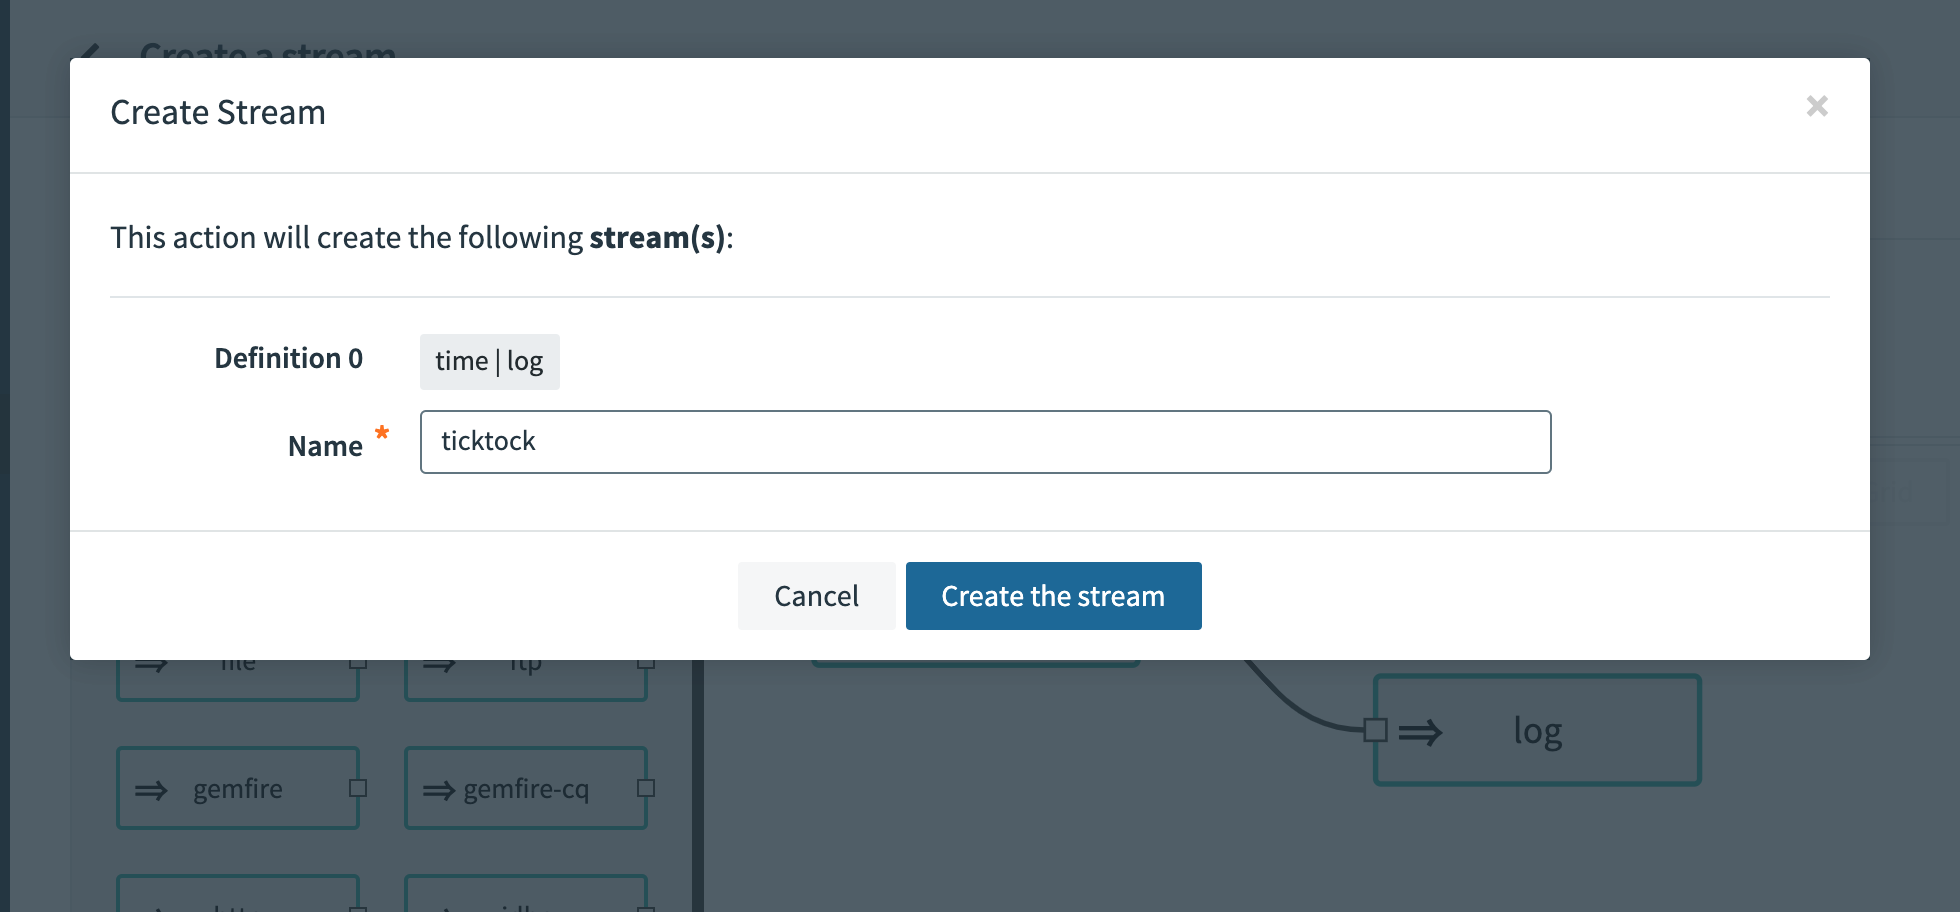
This creates the stream definition and registers it with Spring Cloud Data Flow. Returning to the stream list page, you can see the stream definition.

Now you can deploy the stream to your local environment using the application. Click the play button labeled Deploy to show the deployment properties page.
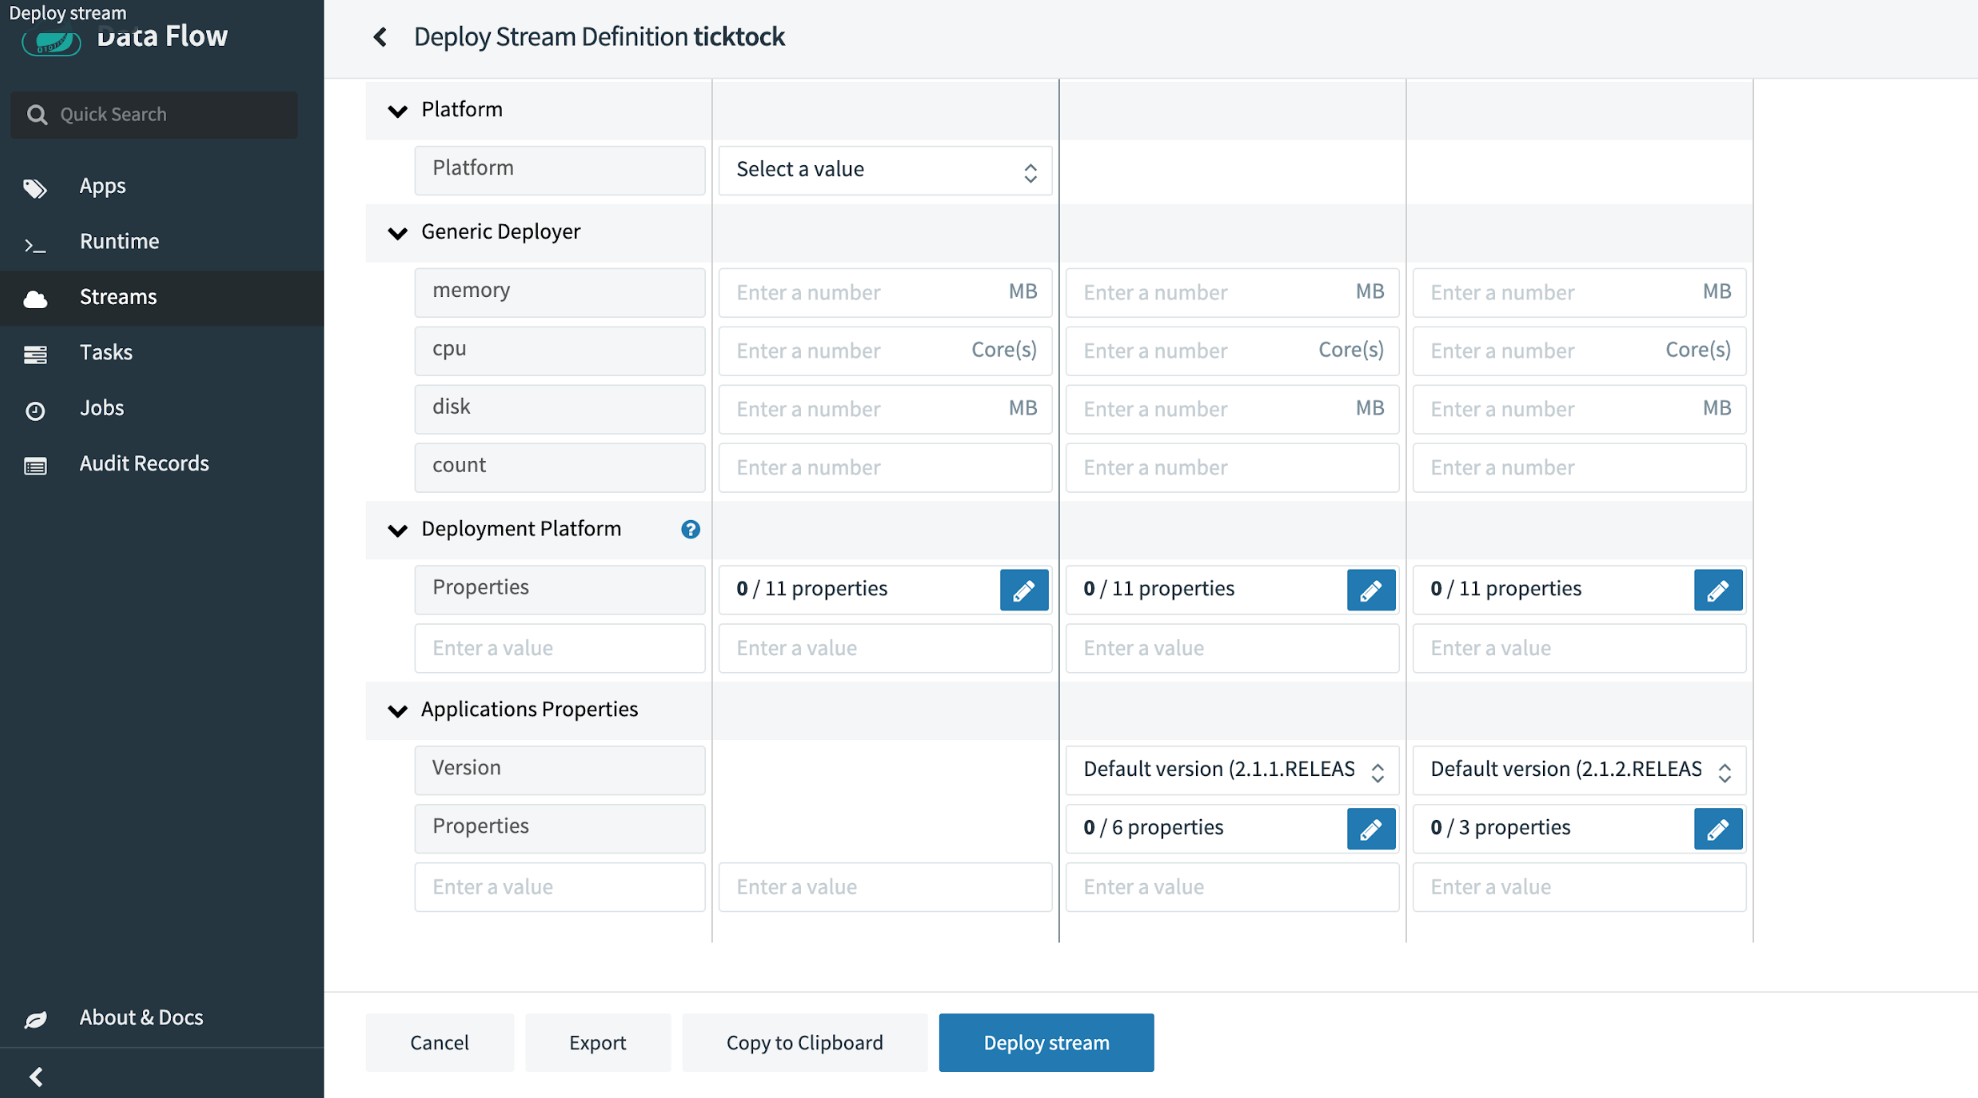
This page allows you to select your deployment platform, generic selections like RAM and CPU limits, as well as application properties. Use the default deployer (local), and because you’re deploying locally, set the port. Because streams are composed of several different applications working together to complete their goal, running them in the same environment requires different ports to be used for each application.
This is accomplished by setting an application property in the deployment window. Enter a key of server.port and a value of any open port on your computer, and deploy the stream by clicking the Deploy button.
You may need to refresh the page several times while the stream deploys. Once it’s deployed, you will see the status change from DEPLOYING to DEPLOYED.

If you click on the name of the stream, you can see detailed information, such as its deployment properties, definition, and the application logs from the runtime. This page also gives you a detailed history of the flags generated at runtime for the topics/queues, consumer groups, any standard connection details (like how to connect to Kafka), and gives you a history of changes for that particular stream.
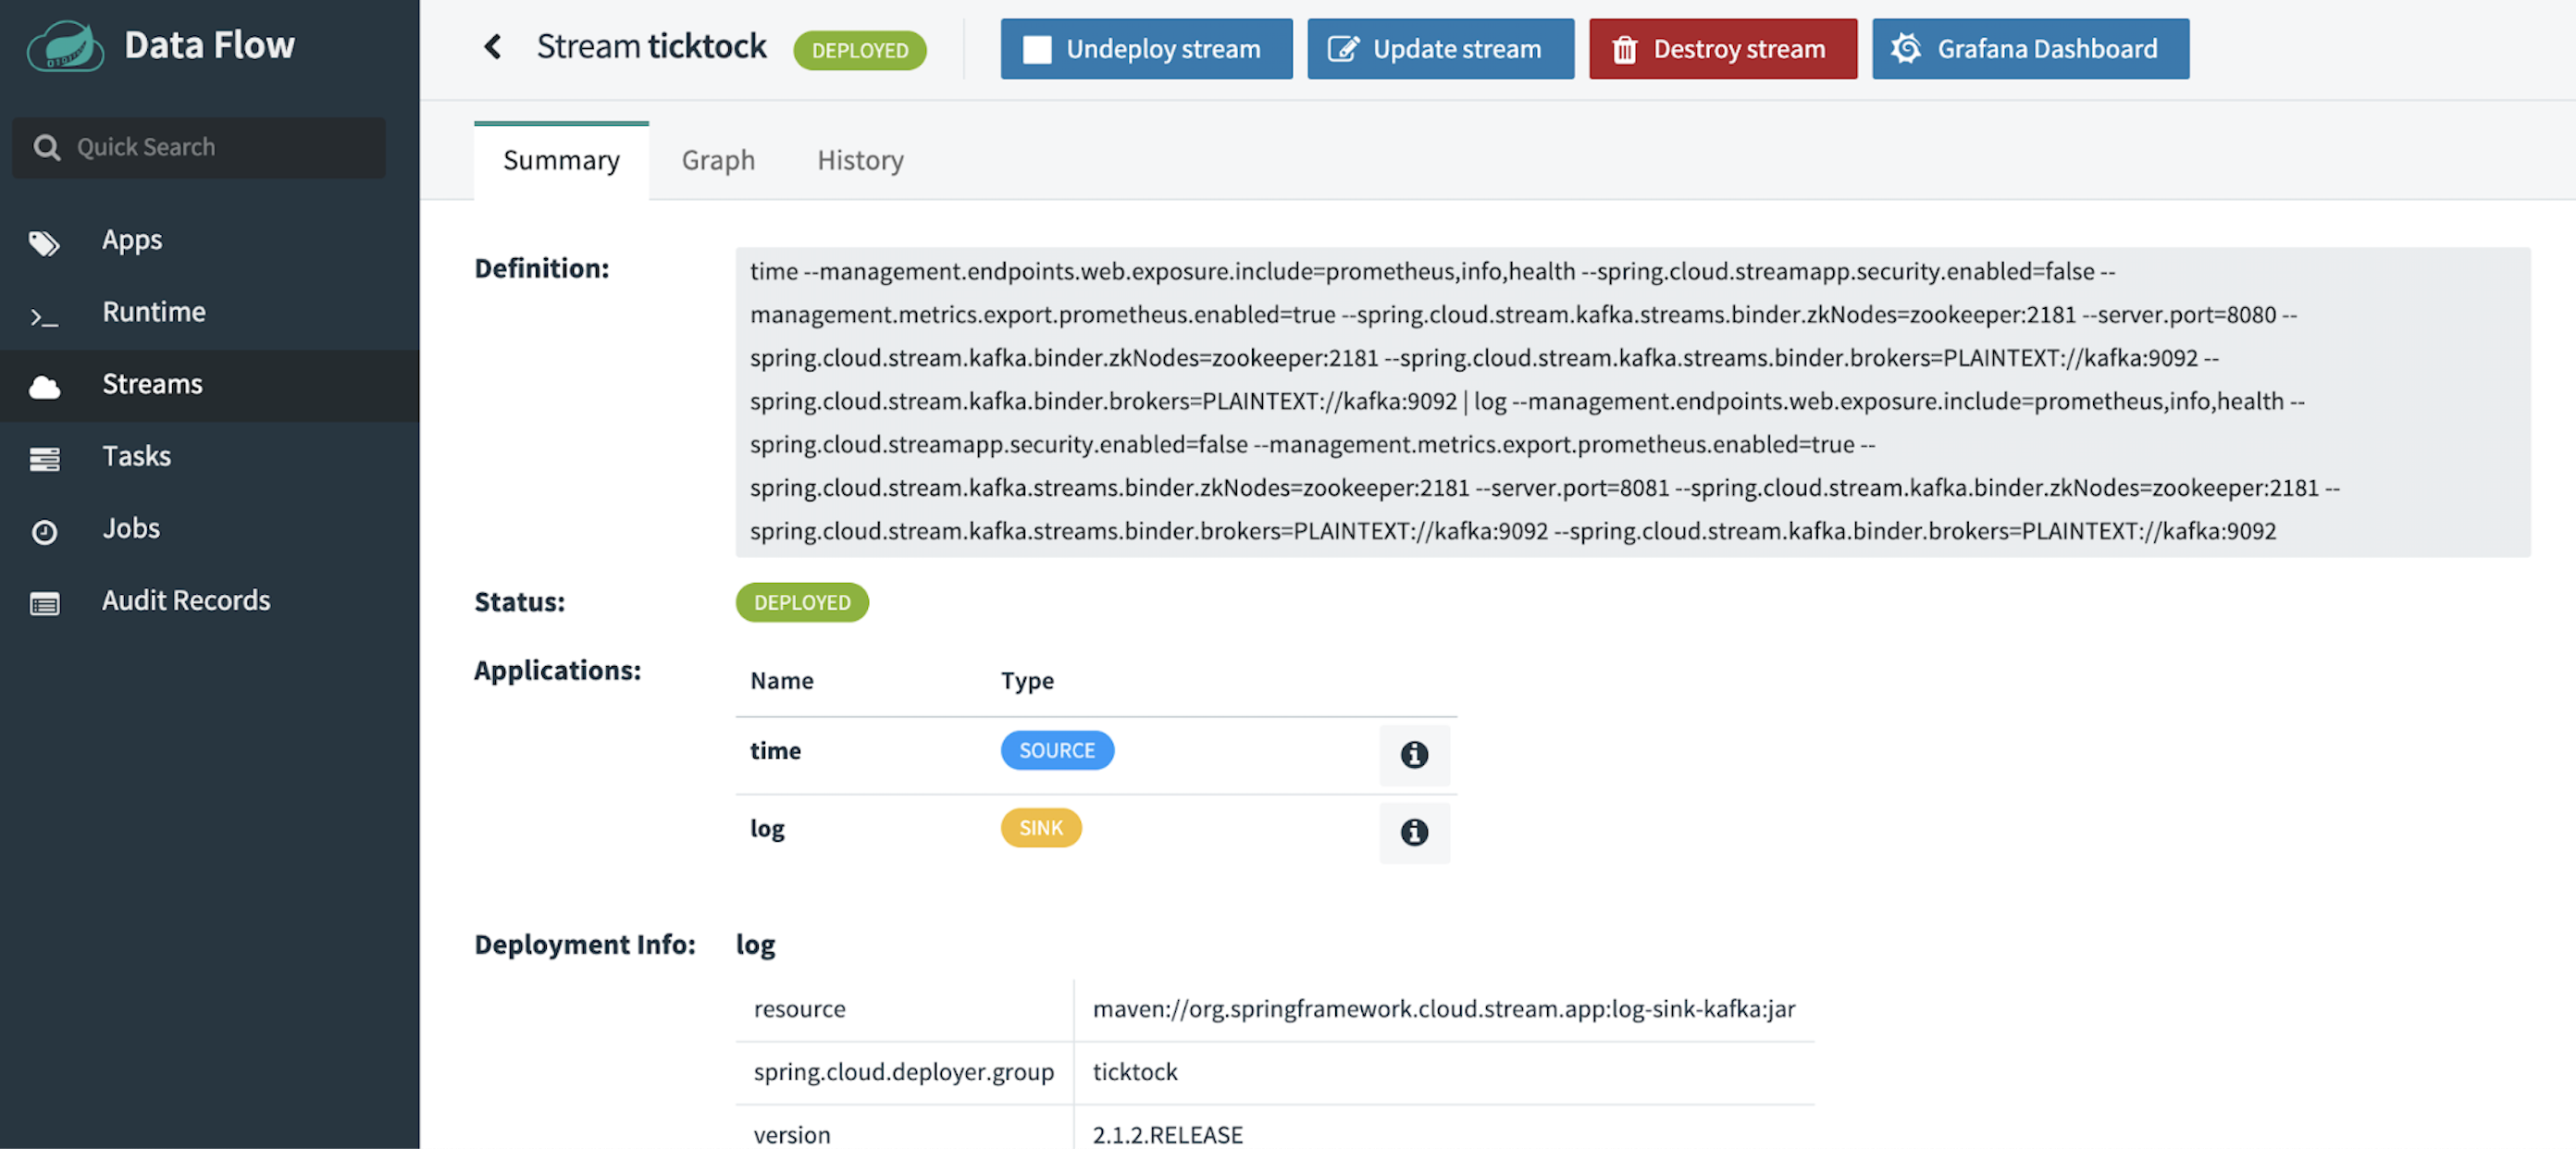
The dropdown for the logs allows you to view logs from any app in the stream. If you select the log application, you can see that the messages were received from Kafka for the time application. You’ve now completed a stream processing deployment! These two applications work together by generating messages in the form of timestamps, sending them to the next application through the Kafka connection, and then the log application receives those messages and outputs them to the log.

You can stop this stream by going back to the stream page and clicking either Undeploy or Destroy stream. Undeploying stops all the resources that the stream uses, allowing you to make changes and reuse the stream. Selecting Destroy removes its definition entirely.

If you’d like to shut down your local Spring Cloud Data Flow instance, you can do so by running the following command in the bash window that you start it from:
$: docker-compose down
Now you’ve got a basic understanding of stream deployment and management. The next section discusses how to prepare for a cloud-native deployment of Spring Cloud Data Flow.
Connecting to Confluent Cloud: Setup and credentials
When evaluating deployments of Data Flow to a cloud-native platform, one factor to consider is which messaging platform to use and how to manage its deployment. After evaluating heavy and complex systems like Google Cloud Pub/Sub and Amazon Kinesis, we ultimately decided on fully managed Apache Kafka as a service with Confluent Cloud. We chose Confluent Cloud due to total cost of operation comparisons and ease of use. Confluent Cloud delivered consistent value for the price and provided crucial business features such as Schema Registry.
Getting started with Confluent Cloud has become easier than ever before. Confluent now provides marketplace integrations for Amazon Web Services (AWS), Microsoft Azure, and Google Cloud. These integrations allow for centralized billing and one-click installation. For this exercise, we use Google Cloud. If you don’t already have access to a billing account with one of these providers, you can also sign up directly with Confluent Cloud. In-depth instructions for how to get set up with the Marketplace can be found in this blog post.
To begin, navigate to the Google Cloud Platform Marketplace and search for “Confluent.” You’ll see “Apache Kafka® on Confluent Cloud.” Click through the tile and click Purchase. Then click Enable.
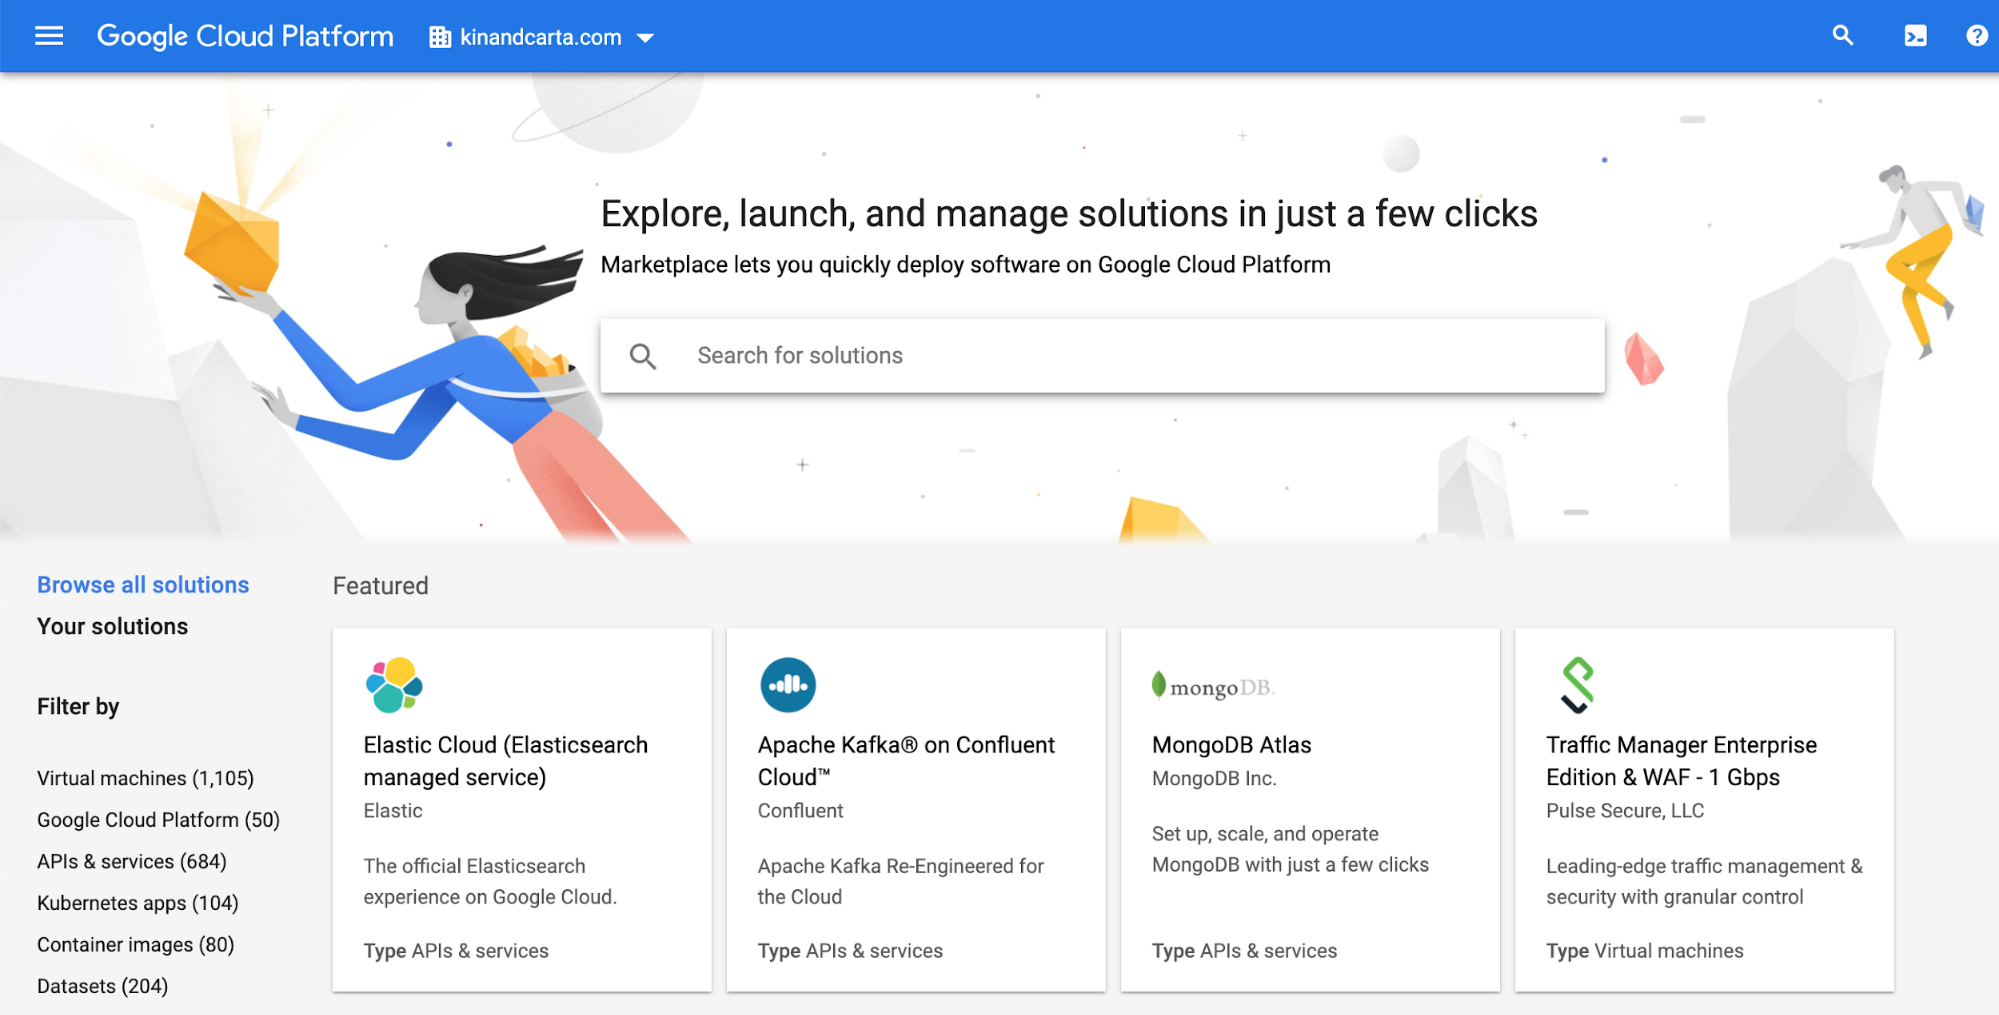
This brings you to the homepage for the Confluent installation.

Click the link for MANAGE VIA CONFLUENT, and either create or sign in with your existing Confluent Cloud credentials. You need to use credentials that you’ve previously created with the marketplace or sign up for new credentials. If you do not initiate this process from the marketplace, you won’t be able to link your billing.
You can now begin to create your managed Kafka cluster by clicking on Create Cluster.
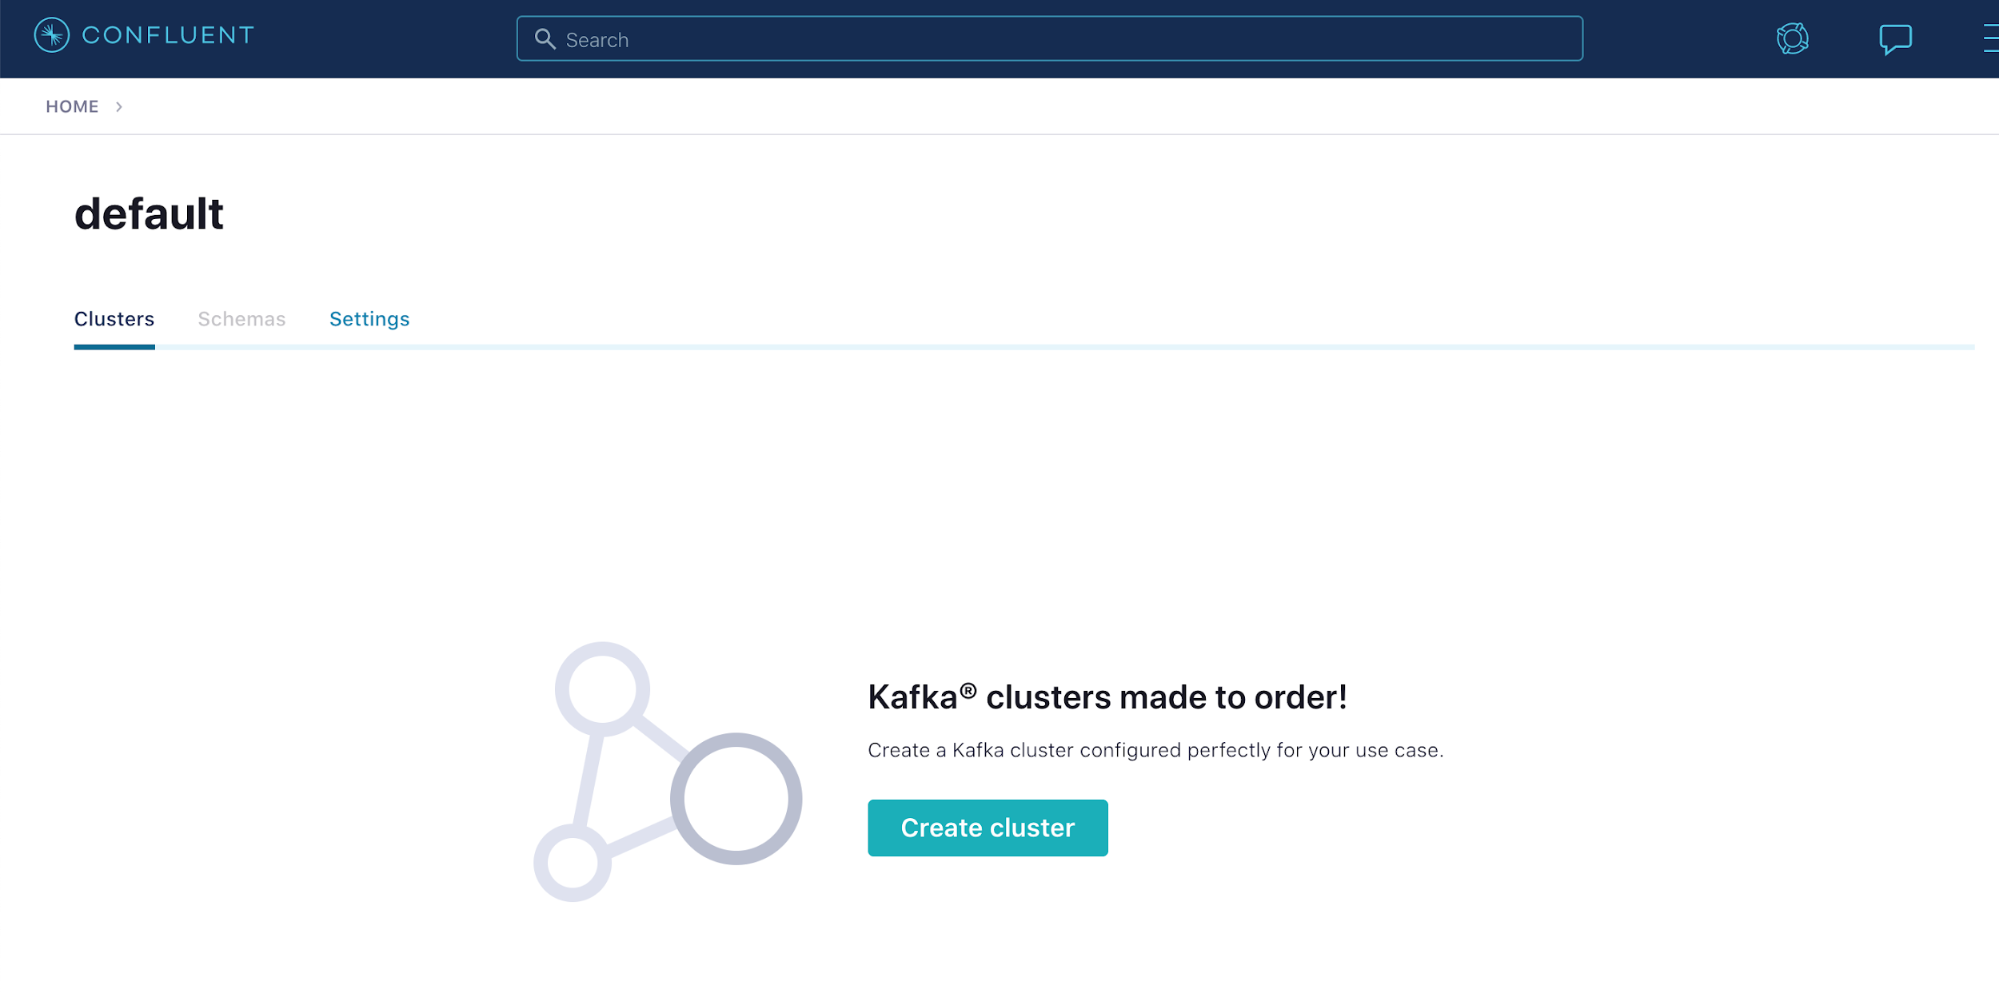
For this exercise, the final deployment platform for Data Flow is Google Cloud Platform; therefore, you want to deploy your Kafka cluster to Google Cloud to ensure the lowest latency and highest resilience. For guidance on creating a cluster, view the documentation. After you click Continue, Confluent will provision a cluster in seconds.
The next page is the management homepage for your Kafka cluster. You need the connection information for your cluster. On the left, select the Cluster Settings menu and select API Access. On this page, you’ll create an API key to use for your authentication.
You may also create API keys when you’re viewing client configurations directly (as shown below), which allows you to copy them directly into your application setup.
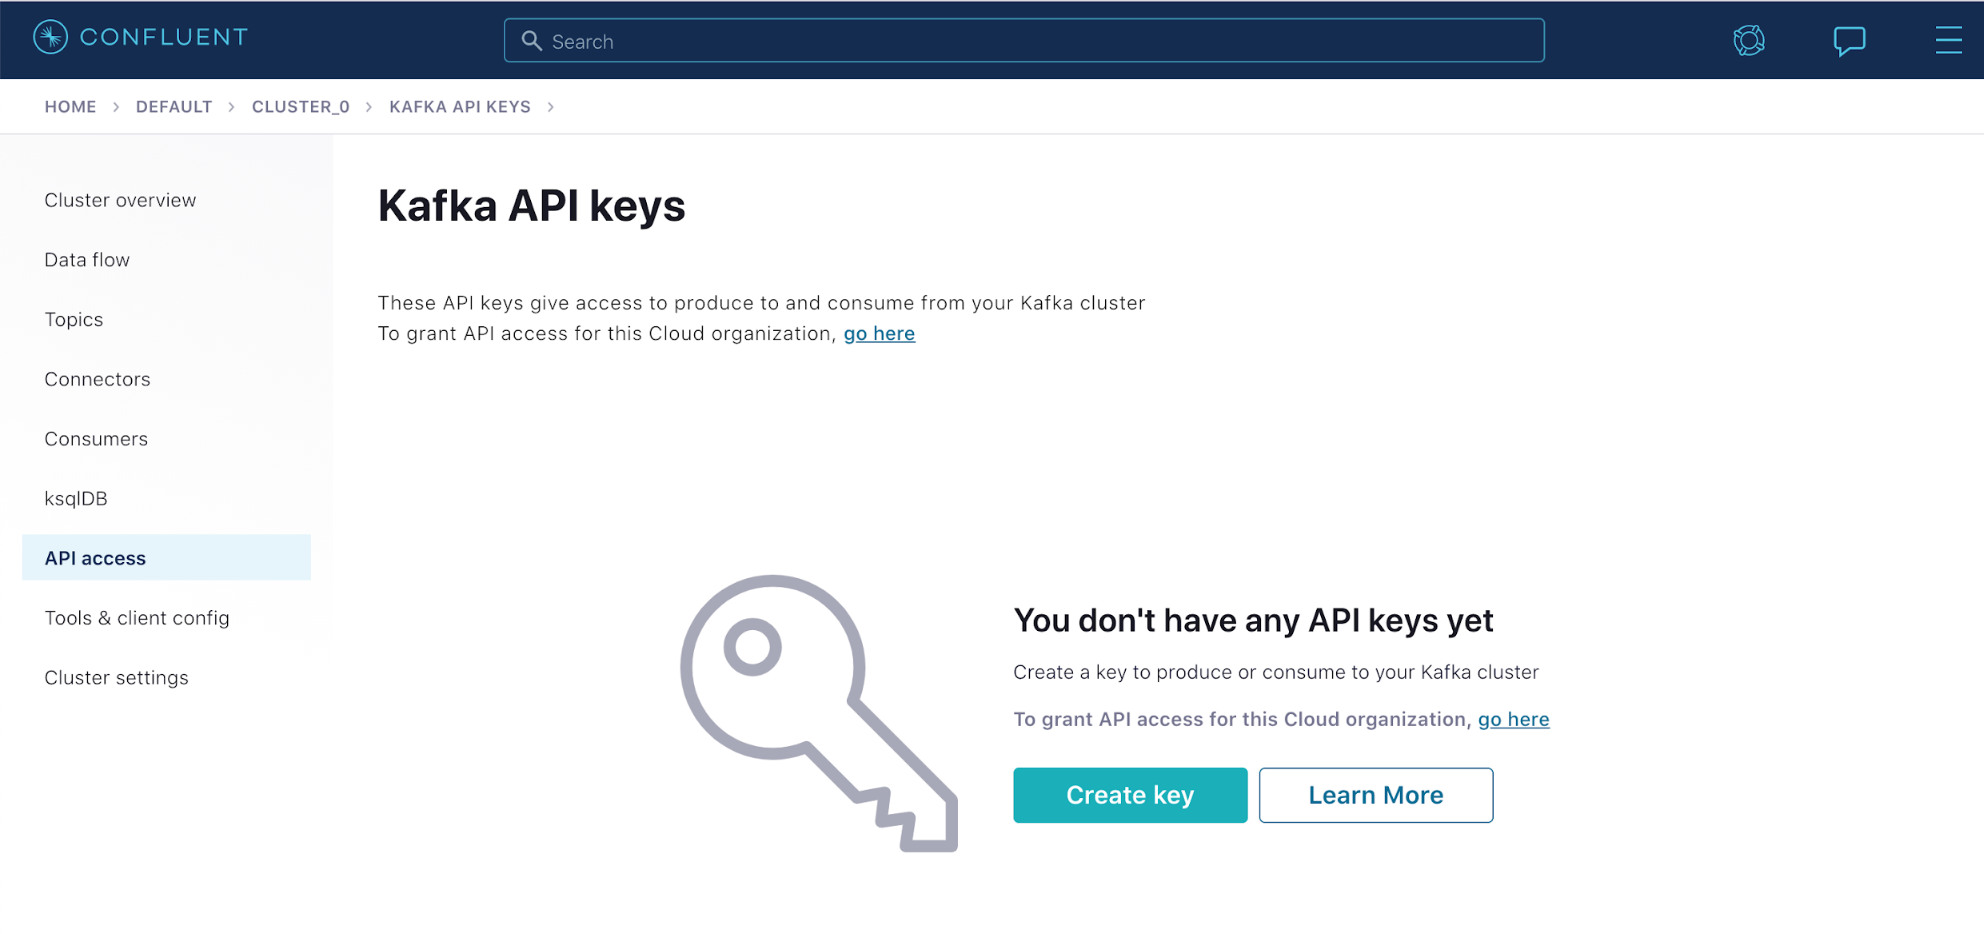
After clicking Create Key, you will be given the key and secret to use; be sure to copy these down since you won’t be able to open the key again. There are two types of keys to use: one attached to your account for development and one you can link to a service account for monitoring and rate control. At this point, use the one attached to your account.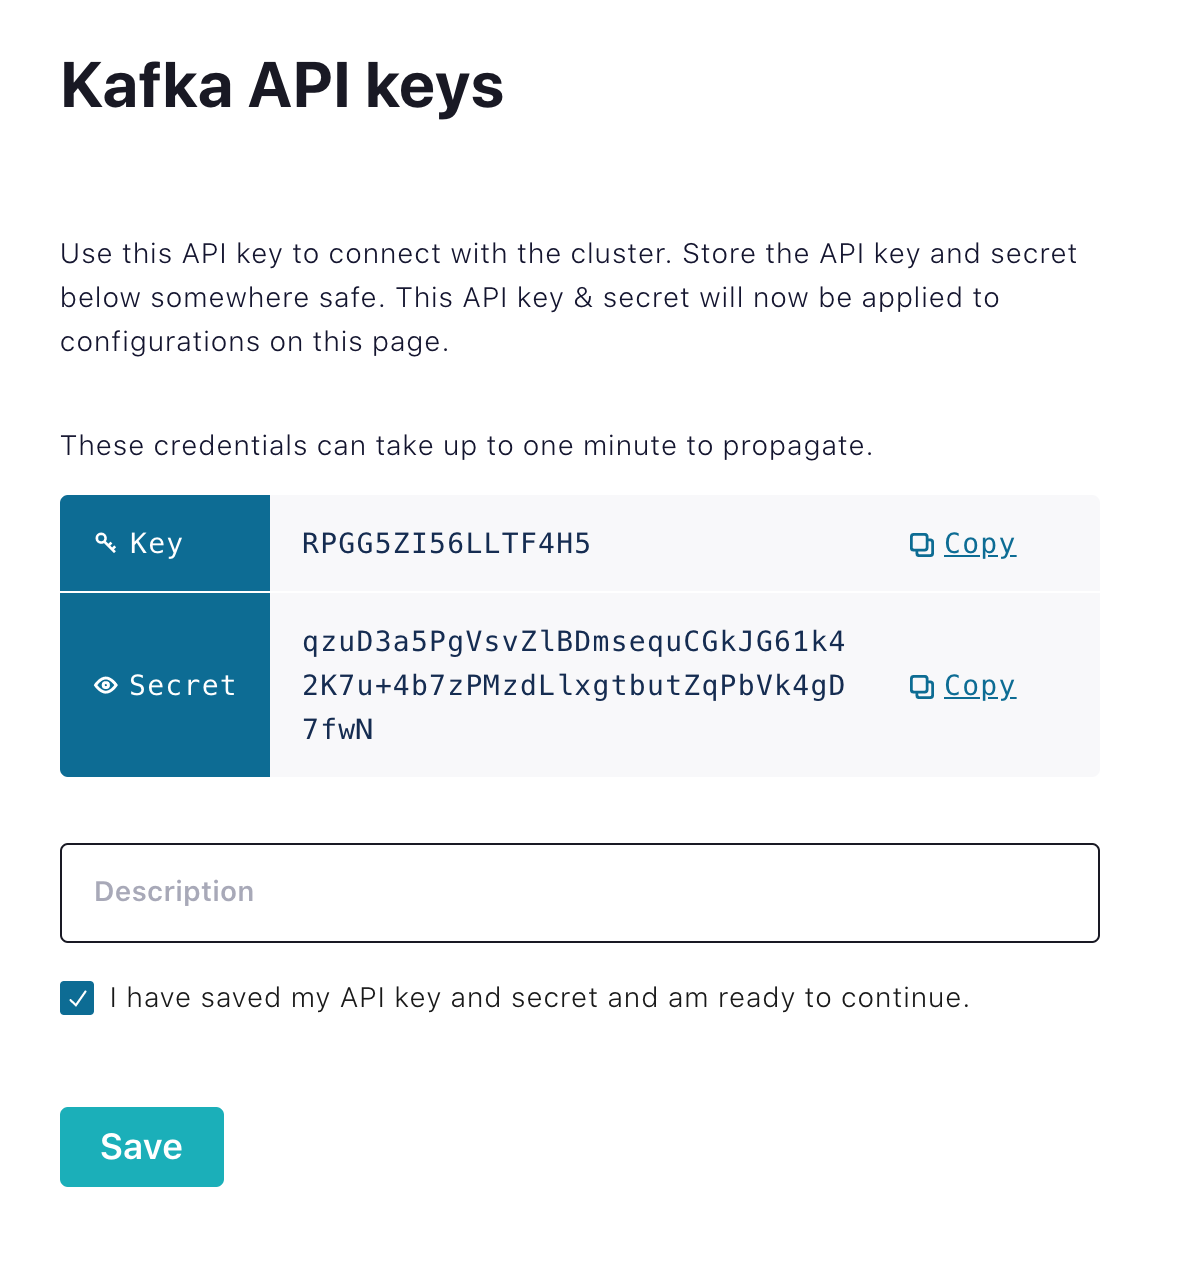
ℹ️Note: These credentials are not valid. Please do not attempt to use them.
Once you have created your key, you can evaluate the connection details. Navigate back to the “Cluster” homepage to find the menu entry for “Tools & Client Configuration,” which hosts a multitude of sample entries for connection to the cluster that you have configured. Select Java given that the applications are written in Spring Boot.
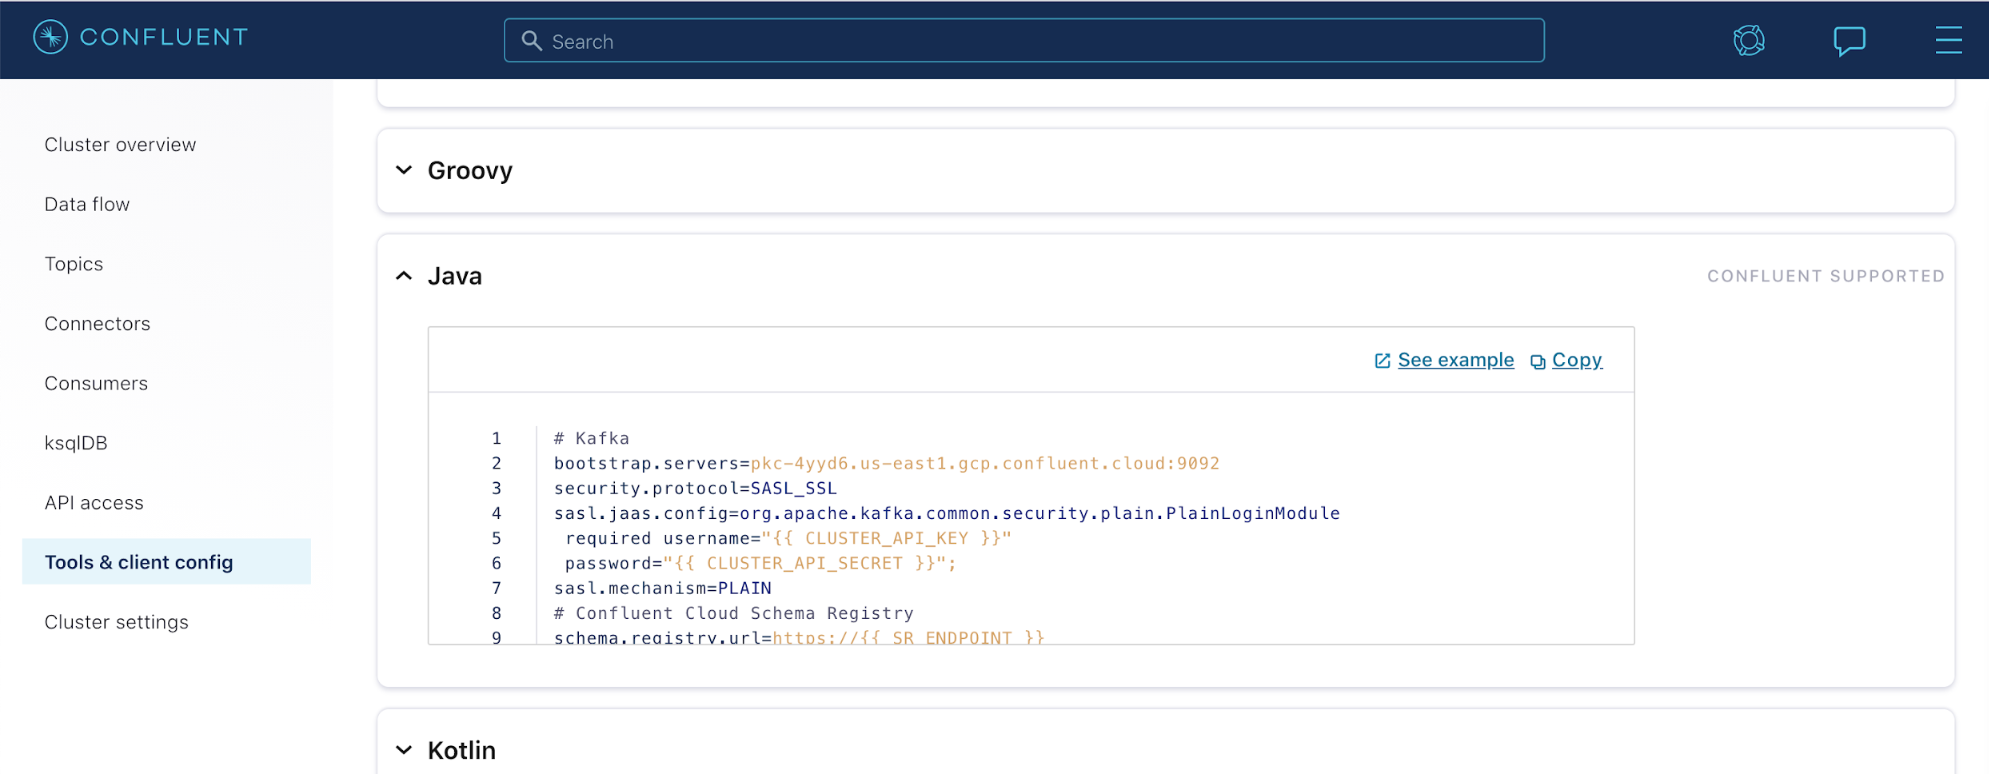
These connection settings are less straightforward than when using Data Flow. These settings propagate to Spring through the binder configurations. To dive deeper into the connection settings, see the documentation. We are not using Kerberos for authentication, so your properties go into spring.cloud.kafka.binder.configuration.<properties> as opposed to the jaas.options section.
This is different from self-managed Kafka installations that use standard Kerberos for authentication.
If you drop in the API key and secret from above, the following properties will result. There are several options that were not directly set; these are the reasonable defaults that Spring Cloud Data Flow provides, such as timeout and backup. You can update these or override them if you desire.
// Cluster Broker Address
spring.cloud.stream.kafka.binder.brokers: pkc-43n10.us-central1.gcp.confluent.cloud:9092

//This property is not given in the java connection. Confluent requires a RF of 3 and spring by default only requests a RF of 1.
NOTE: The newest versions of spring kafka do not require the replication factor as they now default to -1 which uses the server’s specific default.
spring.cloud.stream.kafka.binder.replication-factor:3

//The SSL and SASL Configuration
spring.cloud.stream.kafka.binder.configuration.ssl.endpoint.identification.algorithm: https
spring.cloud.stream.kafka.binder.configuration.sasl.mechanism: PLAIN
spring.cloud.stream.kafka.binder.configuration.request.timeout.ms: 20000
spring.cloud.stream.kafka.binder.configuration.retry.backoff.ms: 500

// The SASL Jaas options (as opposed to Kerberos JAAS) note this should ALL be on one line
spring.cloud.stream.kafka.binder.configuration.sasl.jaas.config: org.apache.kafka.common.security.plain.PlainLoginModule required username="KWUIHDJ4CWYTUUZ2" password="woa0osn+AkzkfgCDDJ3mg5VPW0YVvdSsMGz20iDK0rNYuulxbgkAP8WWp02KOrYy";
spring.cloud.stream.kafka.binder.configuration.security.protocol: SASL_SSL
The details include a property that isn’t included in the connection details. The replication-factor is a setting that controls the amount of redundancy for messages that the broker maintains. This isn’t necessary in the newest versions of Kafka Connect.
In order to test this configuration and your cluster’s connection, you can write a quick stream application. Let’s jump directly to adding these settings to the deployment.
Connecting Spring Cloud Data Flow to an external broker
Before enabling Confluent Cloud to Data Flow, let’s discuss the way that settings are applied. Spring Cloud Data Flow uses two services to manage and deploy applications:
- The Spring Cloud Data Flow server is responsible for global properties that are applied to all streams regardless of the platform that they are deployed to. This is typically where you would apply aspects like your monitoring system parameters. The Data Flow server is also responsible for maintaining application versioning and stream definitions. The Skipper server is responsible for application deployments.
- The properties in the Skipper server are collated into platform-specific properties, such as properties specific to local deployment, Kafka deployments, Cloud Foundry, or Kubernetes. You can explore the Spring Cloud Data Flow microsite for further details on exactly how the architecture is outlined.
This exercise works on a Kafka-only environment that will be separated by environment through different deployments. Thus, add your connection details from above to the Data Flow server directly. This is done by editing the environment properties for the server in the docker-compose.yml file.
Look for the service dataflow-server and, under that, the environment properties. You can see several defaults that are set already for the default connections with Kafka and ZooKeeper. Next, replace these with your connections to Confluent Cloud.
Begin by removing the following lines:
- spring.cloud.dataflow.applicationProperties.stream.spring.cloud.stream.kafka.binder.brokers=PLAINTEXT://kafka:9092
- spring.cloud.dataflow.applicationProperties.stream.spring.cloud.stream.kafka.streams.binder.brokers=PLAINTEXT://kafka:9092
- spring.cloud.dataflow.applicationProperties.stream.spring.cloud.stream.kafka.binder.zkNodes=zookeeper:2181
- spring.cloud.dataflow.applicationProperties.stream.spring.cloud.stream.kafka.streams.binder.zkNodes=zookeeper:2181
Notice that all of these properties are standard Spring properties prepended with spring.cloud.dataflow.applicationProperties—that’s because Data Flow is a Spring Boot app! All you need to do is add in the properties from above with the same prefix. There are, however, a few intricacies. The way that the deployer converts and maps these properties is via a tree structure. The spring.cloud.dataflow.applicationProperties is the base node for all default application properties that are mapped with Data Flow. An indicator following it signals whether those properties apply to stream, batch, or task applications. Stream processing apps will look like the following:
// Cluster Broker Address
spring.cloud.dataflow.applicationProperties.stream.spring.cloud.stream.kafka.binder.brokers: pkc-43n10.us-central1.gcp.confluent.cloud:9092

//This property is not given in the java connection. Confluent requires a RF of 3 and spring by default only requests a RF of 1.
spring.cloud.dataflow.applicationProperties.stream.spring.cloud.stream.kafka.binder.replication-factor:3

//The SSL and SASL Configuration
spring.cloud.dataflow.applicationProperties.stream.spring.cloud.stream.kafka.binder.configuration.ssl.endpoint.identification.algorithm: https
spring.cloud.dataflow.applicationProperties.stream.spring.cloud.stream.kafka.binder.configuration.sasl.mechanism: PLAIN
spring.cloud.dataflow.applicationProperties.stream.spring.cloud.stream.kafka.binder.configuration.request.timeout.ms: 20000
spring.cloud.dataflow.applicationProperties.stream.spring.cloud.stream.kafka.binder.configuration.retry.backoff.ms: 500

// The SASL Jaas options (as opposed to Kerberos JAAS) note this should ALL be on one line
spring.cloud.dataflow.applicationProperties.stream.spring.cloud.stream.kafka.binder.configuration.sasl.jaas.config: org.apache.kafka.common.security.plain.PlainLoginModule required username="R6JGMNN7AMGVPBG7" password="Q4W0t/u8NIFqnaaXYNqkvp8fYwQ3kQlZPdctQbxQGx6u7nHLZvHTpo0VPZWzEOA1";
spring.cloud.dataflow.applicationProperties.stream.spring.cloud.stream.kafka.binder.configuration.security.protocol: SASL_SSL
  dataflow-server:
    image: springcloud/spring-cloud-dataflow-server:${DATAFLOW_VERSION:?DATAFLOW_VERSION is not set!}
    container_name: dataflow-server
    ports:
      - "9393:9393"
    environment:
      - spring.cloud.dataflow.applicationProperties.stream.spring.cloud.stream.kafka.binder.brokers=pkc-4yyd6.us-east1.gcp.confluent.$
      #- spring.cloud.dataflow.applicationProperties.stream.spring.cloud.stream.kafka.streams.binder.brokers=pkc-4yyd6.us-east1.gcp.c$
      - spring.cloud.dataflow.applicationProperties.stream.spring.cloud.stream.kafka.binder.replication-factor=3
      - spring.cloud.stream.kafka.binder.configuration.ssl.endpoint.identification.algorithm=https
      - spring.cloud.stream.kafka.binder.configuration.sasl.mechanism=PLAIN
      - spring.cloud.stream.kafka.binder.configuration.request.timeout.ms=20000
      - spring.cloud.stream.kafka.binder.configuration.retry.backoff.ms=500
      - spring.cloud.stream.kafka.binder.configuration.sasl.jaas.config=org.apache.kafka.common.security.plain.PlainLoginModule requi$
      - spring.cloud.stream.kafka.binder.configuration.security.protocol=SASL_SSL
      #- spring.cloud.dataflow.applicationProperties.stream.spring.cloud.stream.kafka.binder.zkNodes=zookeeper:2181
      #- spring.cloud.dataflow.applicationProperties.stream.spring.cloud.stream.kafka.streams.binder.zkNodes=zookeeper:2181
      - spring.cloud.skipper.client.serverUri=http://skipper-server:7577/api
      - SPRING_DATASOURCE_URL=jdbc:mysql://mysql:3306/dataflow
      - SPRING_DATASOURCE_USERNAME=root
      - SPRING_DATASOURCE_PASSWORD=rootpw
      - SPRING_DATASOURCE_DRIVER_CLASS_NAME=org.mariadb.jdbc.Driver
    #depends_on:
      #- kafka-broker
After editing your docker-compose.yaml file, it should look like this:
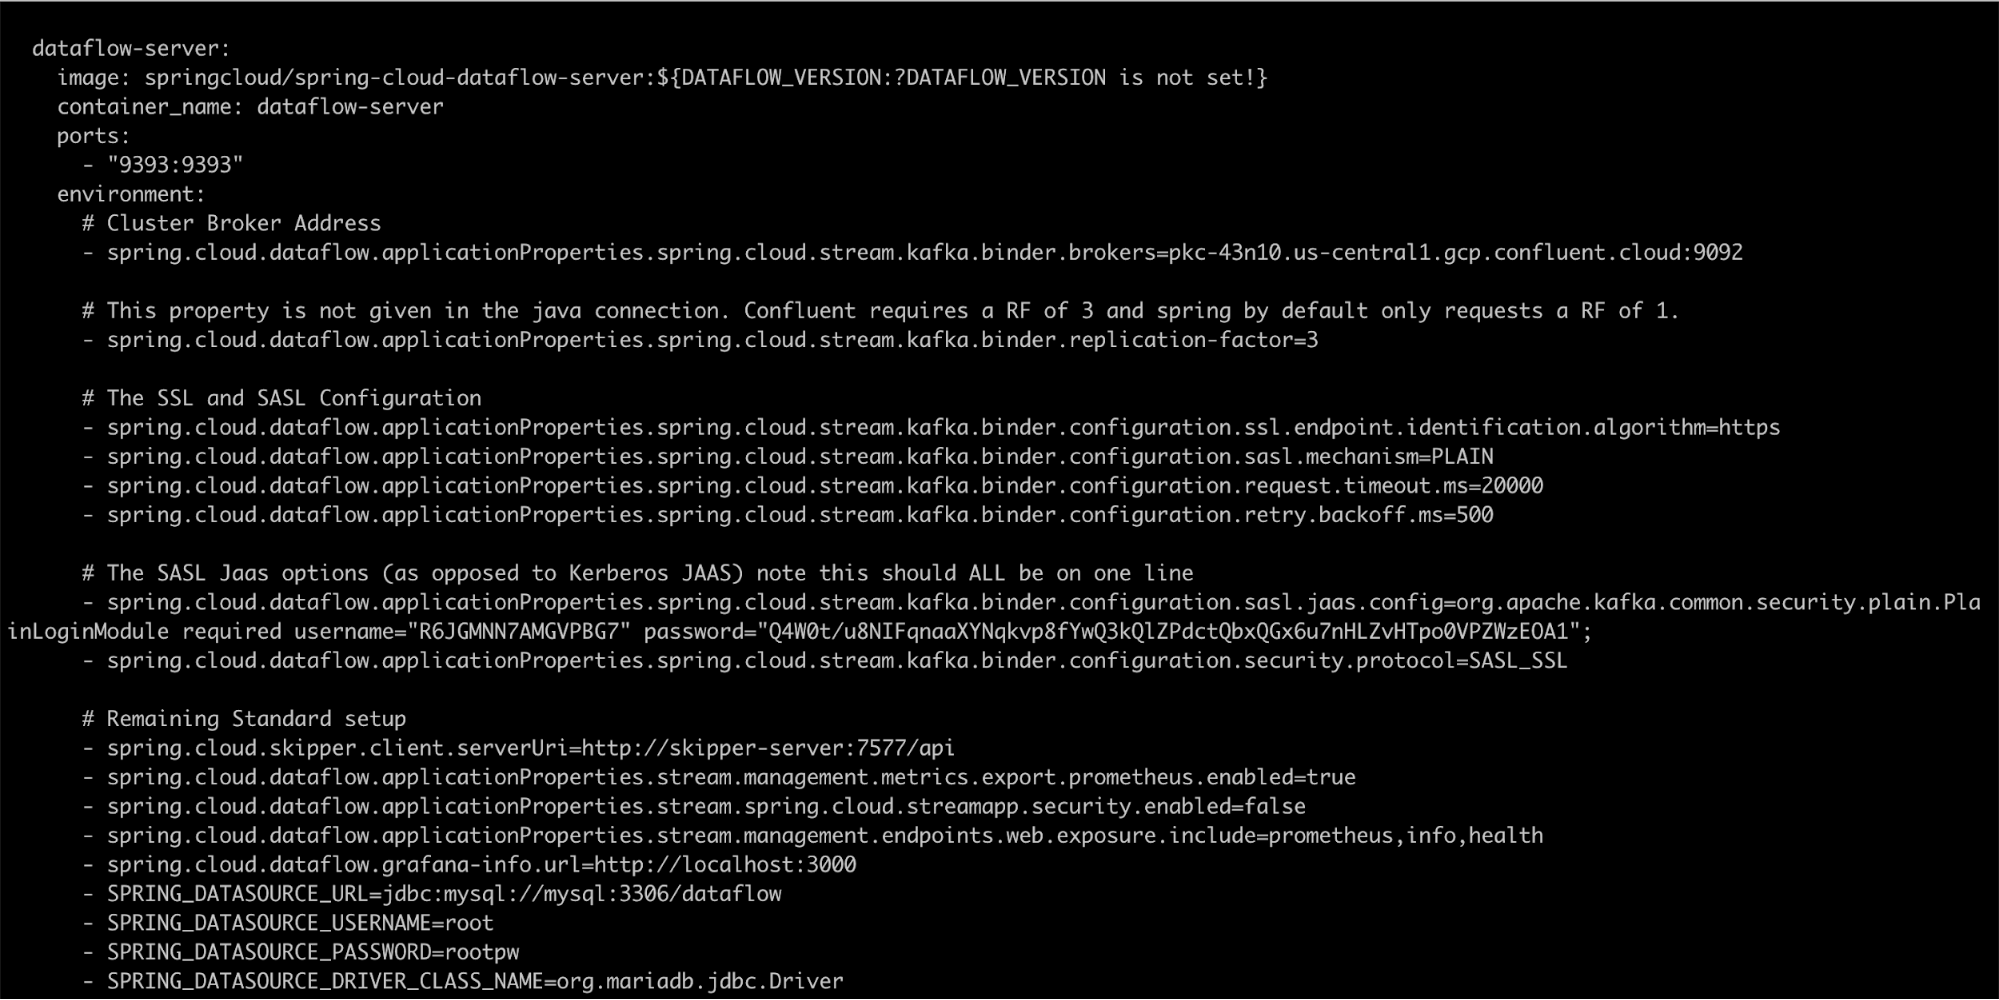
Notice that this setup still stands up Kafka and ZooKeeper. You can skip deployment of these services by commenting out the ZooKeeper and Kafka services and removing the depends_on: -kafka lines from the dataflow-server service.
You can now start your Docker Compose again using the same commands as earlier, and you will see that no ZooKeeper or Kafka services are started this time.

If you navigate back to the application dashboard, you can repeat the steps to deploy the ticktock application stream. You may need to provide a new name for the stream because names cannot be duplicated. Once it is deployed, navigate to the deployment details, where you’ll see that the application properties applied now reflect your remote Confluent Cluster configuration settings.
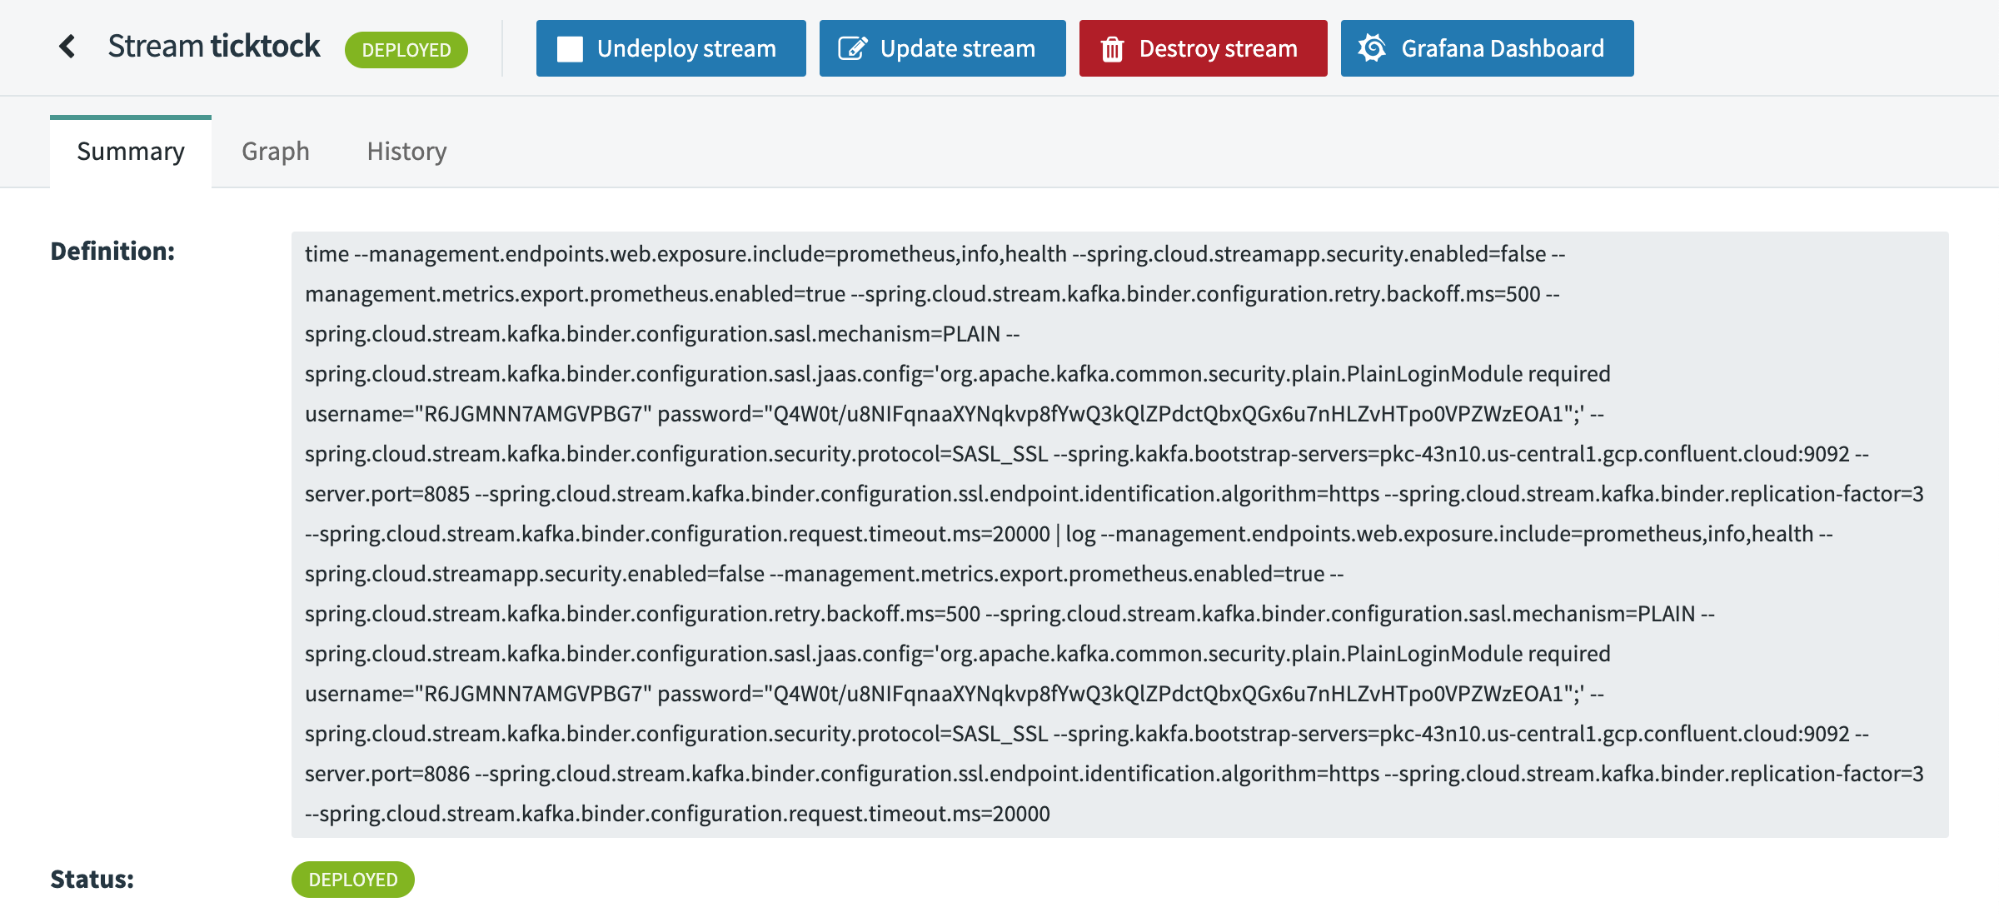
Like earlier, you can review the application logs, see the remote connection created, and observe the messages as they begin to flow. To view these messages on Confluent Cloud, log in to the web portal and click on your topics on the left.
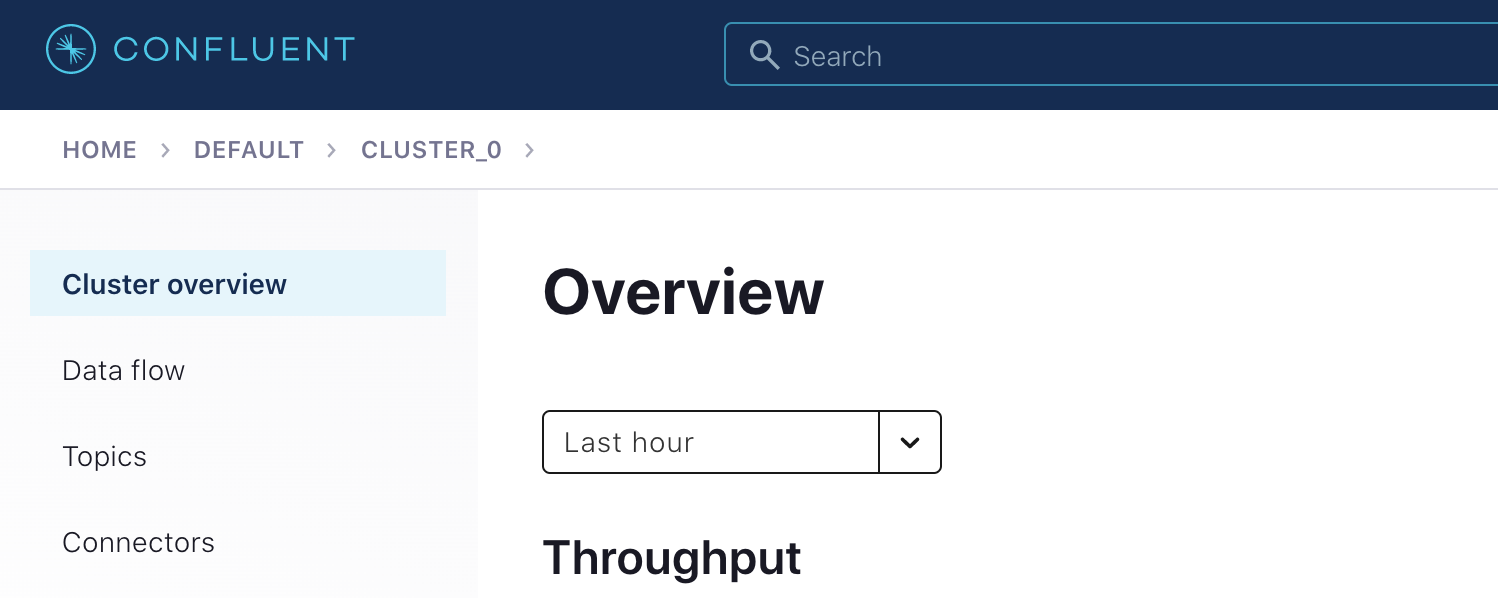
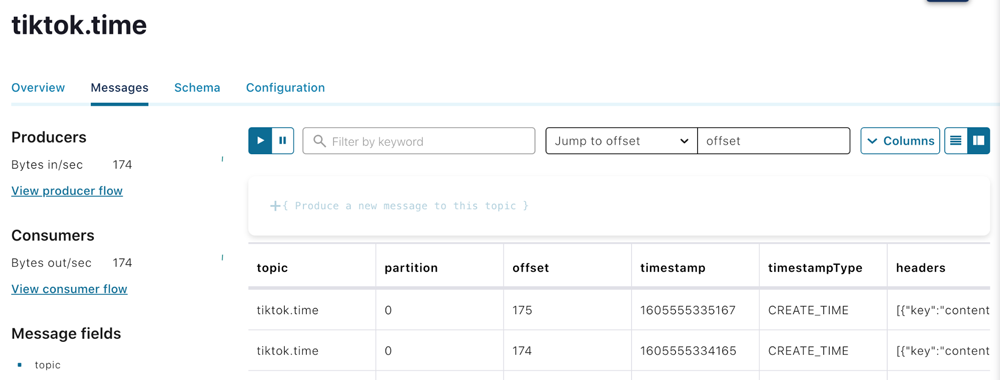
On the topic page, you’ll see the topic created by your ticktok Spring Cloud Dataflow pipeline. These are labeled in the form of <streamName>.<applicationName>. For our stream, it was tiktok.time. You can click the topic name to view messages within the topic.

This page shows you messages as they are delivered to the Kafka broker and allows you to insert your own if you need to.
Congratulations!
You’ve just provisioned a Kafka cluster in the cloud, deployed Spring Cloud Data Flow in a local environment, and wrote a test application to validate your connection details. Don’t forget to spin down all your resources used in the demonstration, such as any Google Cloud project, Confluent Cloud cluster, or Google Cloud Platform Marketplace integrations that you’ve allotted.
The next step is to deploy Spring Cloud Data Flow in the cloud and begin using it daily. If you haven’t already, you can sign up for Confluent Cloud and get started with a fully managed event streaming platform powered by Apache Kafka. Use the promo code SPRING200 to get an additional $200 of free Confluent Cloud usage!
Did you like this blog post? Share it now
Subscribe to the Confluent blog
New with Confluent Platform 7.9: Oracle XStream CDC Connector, Client-Side Field Level Encryption (EA), Confluent for VS Code, and More
This blog announces the general availability of Confluent Platform 7.9 and its latest key features: Oracle XStream CDC Connector, Client-Side Field Level Encryption (EA), Confluent for VS Code, and more.
Meet the Oracle XStream CDC Source Connector
Confluent's new Oracle XStream CDC Premium Connector delivers enterprise-grade performance with 2-3x throughput improvement over traditional approaches, eliminates costly Oracle GoldenGate licensing requirements, and seamlessly integrates with 120+ connectors...

