Kafka in the Cloud: Why it’s 10x better with Confluent | Find out more
Using the Fully Managed MongoDB Atlas Connector in a Secure Environment
Since the MongoDB Atlas source and sink became available in Confluent Cloud, we’ve received many questions around how to set up these connectors in a secure environment.
By default, MongoDB Atlas does not allow any external network connections, such as those from the internet. To allow external connections, you can add a specific IP or a CIDR IP range using the “IP Whitelist” entry dialog under the “Network Access” menu. In order for Confluent Cloud to connect to Atlas, you need to specify the public IP address of your Confluent Cloud cluster.
Note: At the time of this writing, Confluent Cloud provides an IP address dynamically. Due to this variability, you will have to add 0.0.0.0/0 as the whitelist entry to your MongoDB Atlas cluster. To learn more about this requirement, check out the documentation.

This step-by-step guide shows you how to set up a VPC-peered Apache Kafka® cluster to an AWS VPC, as well as how to use a PrivateLink between the AWS VPC and MongoDB Atlas. With this setup, you won’t need to allow 0.0.0.0/0 or a wide range of CIDR in MongoDB Atlas.
Here are the prerequisites:
- A dedicated Kafka cluster in Confluent Cloud (on AWS)
- Note: You can use the promo code CL60BLOG for an additional $60 of free Confluent Cloud usage (details)
- A dedicated MongoDB Atlas cluster with AWS with M10 or above
Create a VPC-peered Kafka cluster
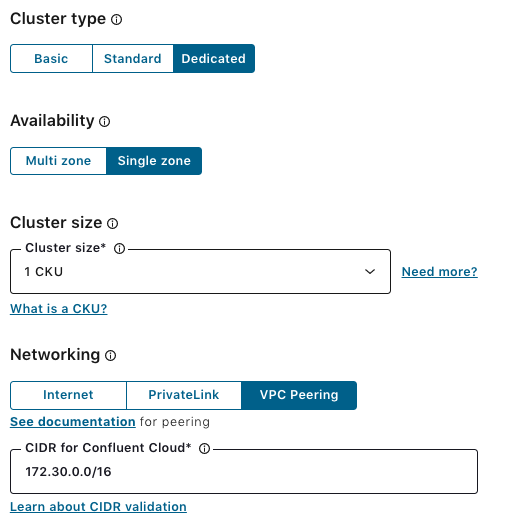
Starting from June 2020, if you are using Confluent Cloud with annual commitments, you can create VPC peered clusters from the Cloud UI without any manual provisioning by engineering. Simply create a dedicated cluster with the VPC peering networking option. To create your dedicated cluster with VPC peering, you need to provide a CIDR for Confluent Cloud. We will use 172.30.0.0/16. The VPC CIDR block for Confluent Cloud requires a /16. Once the Kafka cluster is ready, you will receive an email from Confluent.
In the AWS Management Console, you can create a VPC or use a default VPC with a CIDR block that does not conflict with your Confluent Cloud CIDR (we will use 172.31.0.0/16).

Once you have a VPC, set up your subnet with IPv4 CIDR block (172.31.0.0/16).

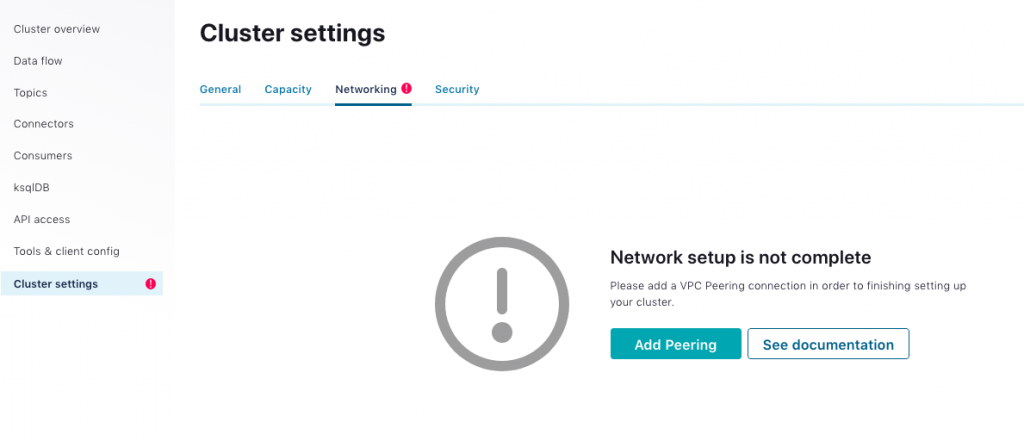
In the cluster settings, click on Add Peering under the “Networking” tab.
Fill out the following form with your AWS account number, AWS VPC ID, and AWS VPC CIDR (172.31.0.0/16).
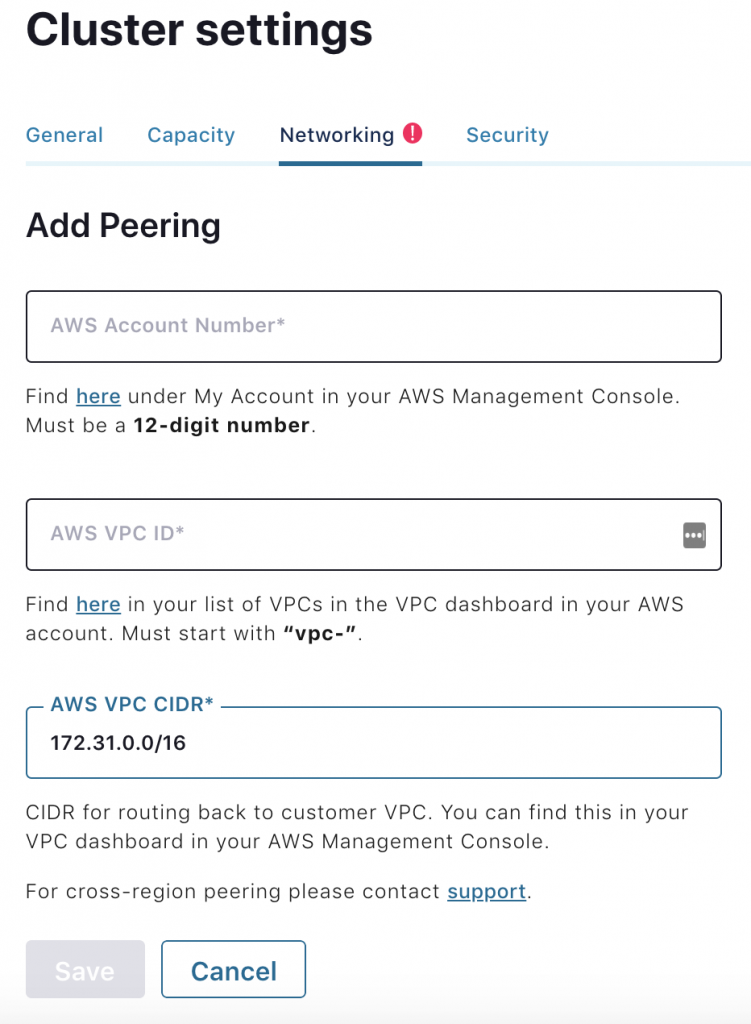
Once the form is filled out, you will be instructed to accept a VPC peering request in your AWS console.

Go to “Peering Connections” under VPC in the AWS console, and accept the VPC peering request from Confluent Cloud. Make sure the Request VPC on AWS is the same as the Confluent VPC ID for your Kafka cluster.

After the VPC peering request is accepted, you will see the active status for your VPC peering connection under the cluster settings in Confluent Cloud.

The last step is to add the new peering connection to the route table for your VPC in the AWS Management Console. Add routes with the Confluent Cloud CIDR (172.30.0.0/16) to the “Destination” column and select Peering Connection in the “Target” column.

If you go to the “Topics” menu through your browser over the public internet, you will see the following warning message Co.
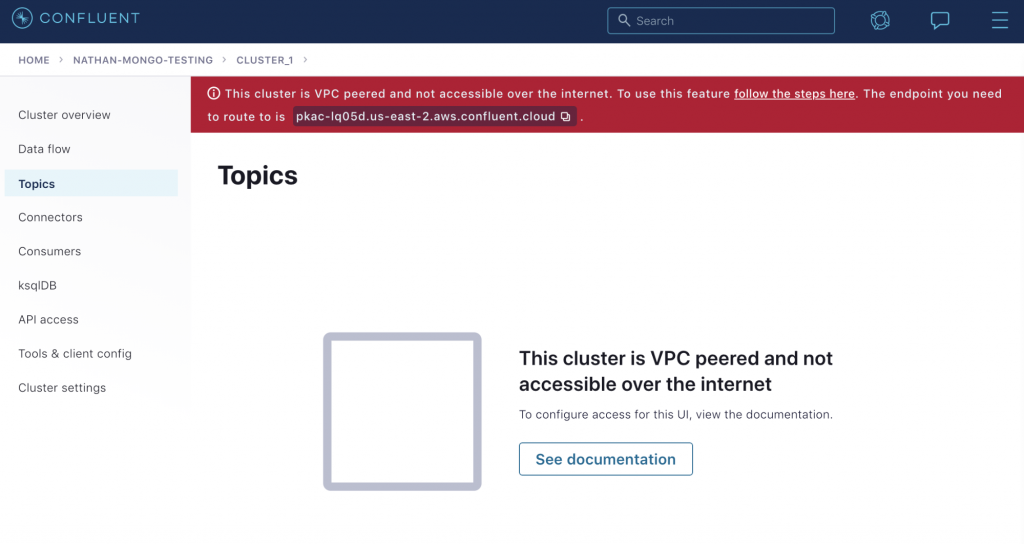
Because we will set up a MongoDB Atlas source connector later, we need to create a topic to which the connector will write data. You can follow the steps in the documentation, but for this demo, I created an EC2 machine and used the Confluent CLI to create the topic mongo.sample_restaurants.restaurants.
[ec2-user@ip-172-31-40-74 ~]$ ccloud kafka topic create mongo.sample_restaurants.restaurants

[ec2-user@ip-172-31-40-74 ~]$ ccloud kafka topic list
Updates are available for ccloud from (current: v1.10.0, latest: v1.17.0).
To view release notes and install them, please run:
$ ccloud update

                  Name
+--------------------------------------+
  mongo.sample_restaurants.restaurants
[ec2-user@ip-172-31-40-74 ~]$
We are all set for the VPC peering between Confluent Cloud and a customer VPC.
Set up a PrivateLink between MongoDB Atlas and AWS VPC
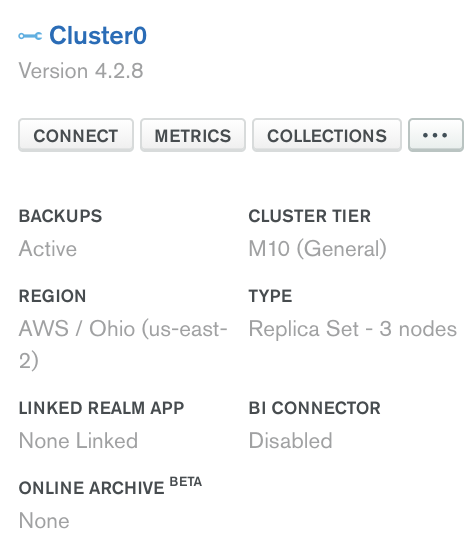
MongoDB has good documentation showing how to set up a PrivateLink. To run the MongoDB source connector, first, make sure your cluster tier is M10 or higher and that the cloud provider is AWS.
In the “Security” section of the left navigation, click Network Access and then click Private Endpoint.
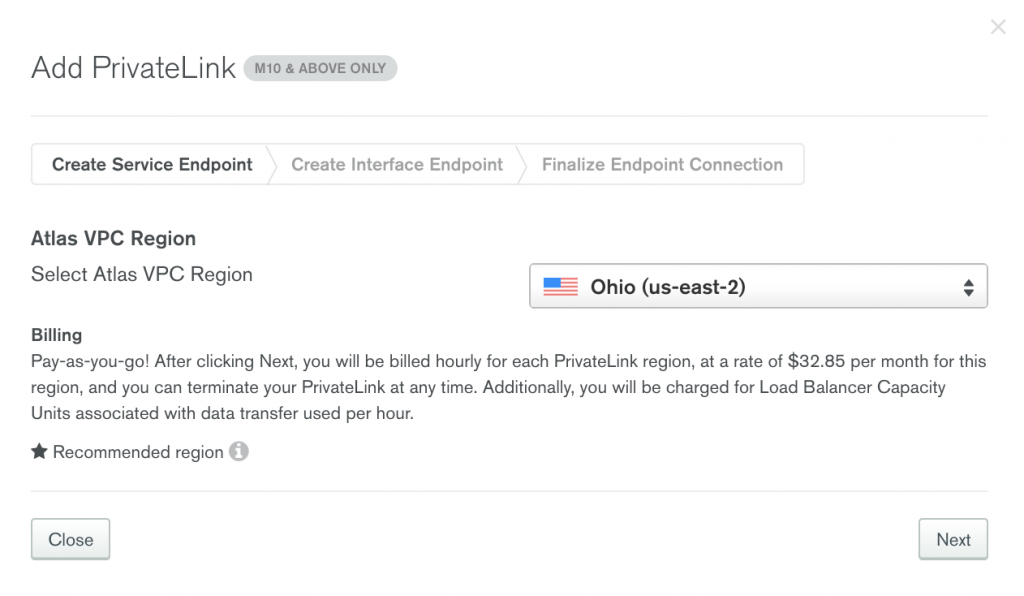
Select the AWS region (us-east-2), in which you want to create the Atlas VPC.
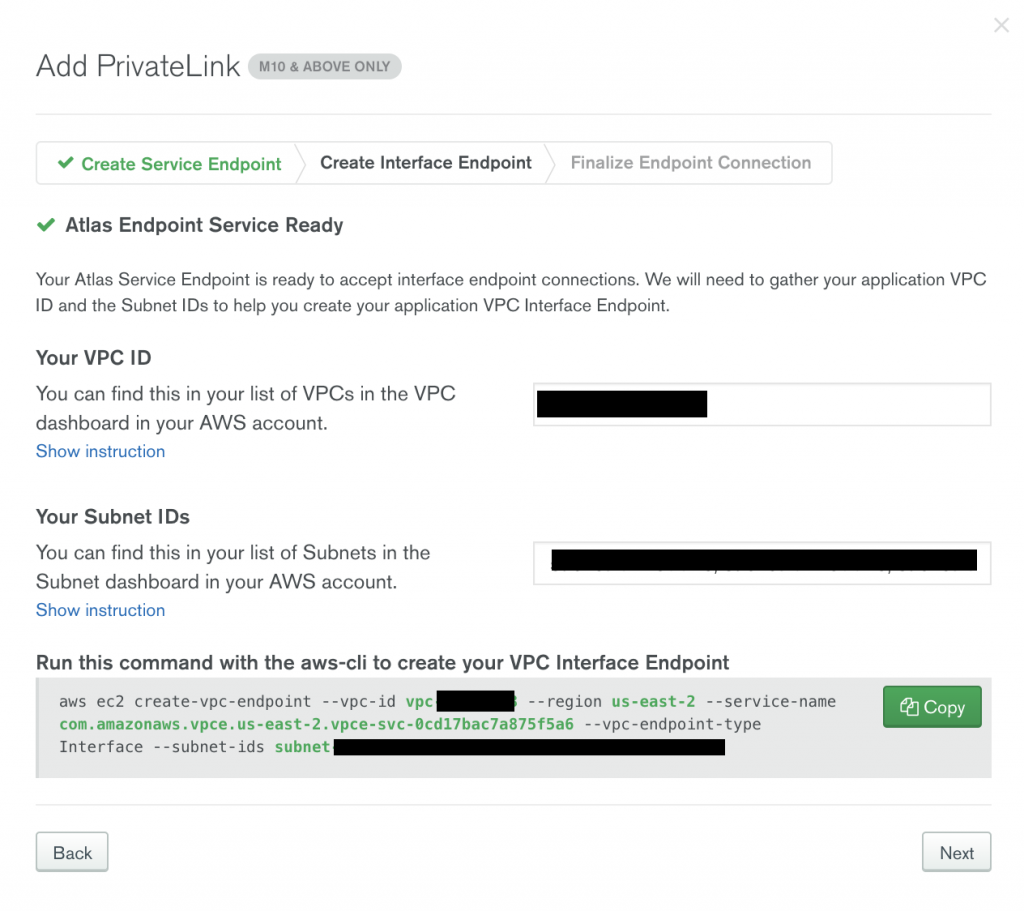
Once you fill out the following form with your AWS VPC ID and subnets, run the following command with the aws-cli to create your VPC interface endpoint.
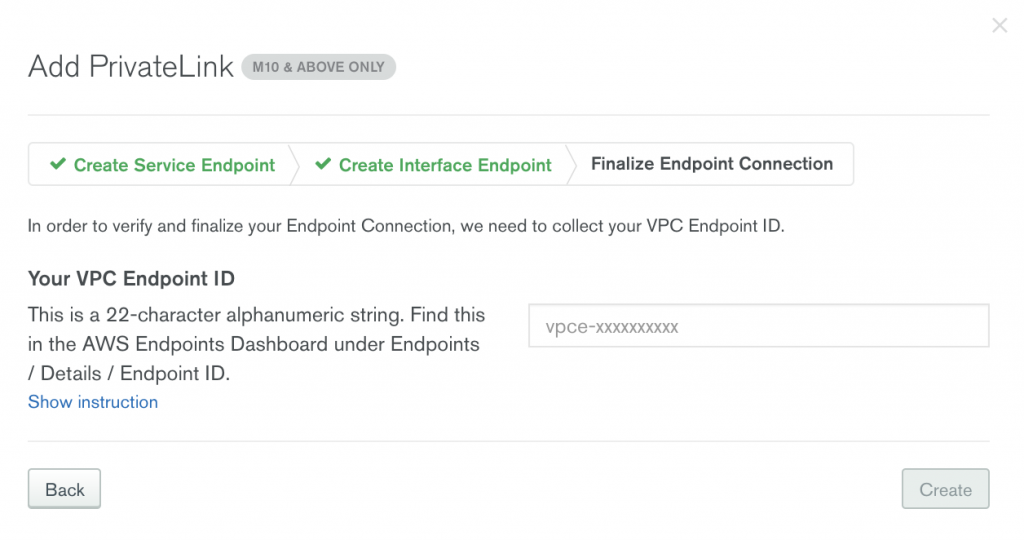
Find the VPC endpoint ID in the AWS endpoints dashboard under Endpoints > Details > Endpoint ID.
A few minutes later, you will see the “Interface Endpoint Status” being changed to “Available.” Now, you have a PrivateLink between the AWS VPC and MongoDB Atlas.
Create a fully managed MongoDB Atlas source connector
Click the MongoDB Atlas source connector icon under the “Connectors” menu in Confluent Cloud, and fill out the configuration properties with MongoDB Atlas. MongoDB Atlas source connector only supports username and password for database access. Check out the MongoDB Atlas connector documentation for the latest information on supported connector properties.
In this example, let’s choose copy.existing.data=true. This parameter will fetch all existing records from the restaurant collection. The connection host for MongoDB Atlas should be a private connection.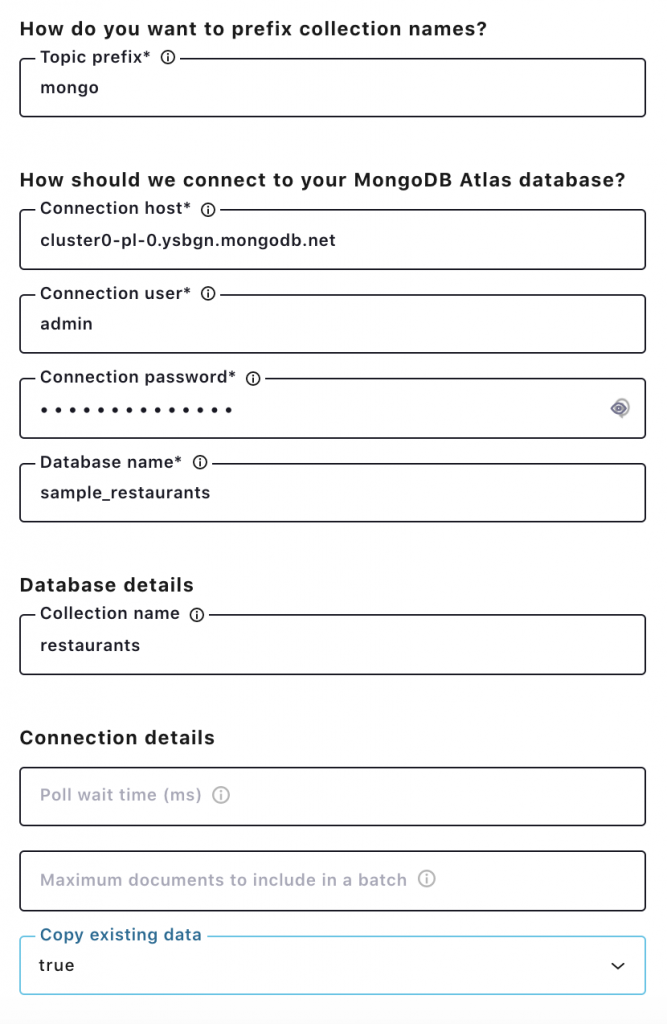
Once the connector is up and running, use the Confluent Cloud CLI to see restaurant records.
[ec2-user@ip-172-31-40-74 ~]$ ccloud connector list

     ID     |             Name              | Status  |  Type  | Trace
+-----------+-------------------------------+---------+--------+-------+
  lcc-kxj72 | MongoDbAtlasSourceConnector_0 | RUNNING | source |

[ec2-user@ip-172-31-40-74 ~]$ ccloud kafka topic consume mongo.sample_restaurants.restaurants -b

{"_id": {"_id": {"$oid": "5eb3d668b31de5d588f42fe3"}, "copyingData": true}, "operationType": "insert", "ns": {"db": "sample_restaurants", "coll": "restaurants"}, "documentKey": {"_id": {"$oid": "5eb3d668b31de5d588f42fe3"}}, "fullDocument": {"_id": {"$oid": "5eb3d668b31de5d588f42fe3"}, "address": {"building": "93", "coord": [-74.0019169, 40.7373179], "street": "Greenwich Avenue", "zipcode": "10014"}, "borough": "Manhattan", "cuisine": "Café/Coffee/Tea", "grades": [{"date": {"$date": 1411689600000}, "grade": "A", "score": 2}, {"date": {"$date": 1380240000000}, "grade": "A", "score": 7}, {"date": {"$date": 1349913600000}, "grade": "A", "score": 11}, {"date": {"$date": 1320019200000}, "grade": "A", "score": 11}], "name": "Starbucks Coffee (Store 7261)", "restaurant_id": "40546257"}}
{"_id": {"_id": {"$oid": "5eb3d668b31de5d588f42fe8"}, "copyingData": true}, "operationType": "insert", "ns": {"db": "sample_restaurants", "coll": "restaurants"}, "documentKey": {"_id": {"$oid": "5eb3d668b31de5d588f42fe8"}}, "fullDocument": {"_id": {"$oid": "5eb3d668b31de5d588f42fe8"}, "address": {"building": "31", "coord": [-73.988895, 40.739047], "street": "East   20 Street", "zipcode": "10003"}, "borough": "Manhattan", "cuisine": "Italian", "grades": [{"date": {"$date": 1408406400000}, "grade": "A", "score": 12}, {"date": {"$date": 1374796800000}, "grade": "A", "score": 13}, {"date": {"$date": 1343260800000}, "grade": "A", "score": 13}, {"date": {"$date": 1332115200000}, "grade": "A", "score": 9}], "name": "La Pizza Fresca", "restaurant_id": "40546849"}}
...
Now, you have a MongoDB Atlas Source connector running through a VPC-peered Kafka cluster to an AWS VPC, as well as a PrivateLink between AWS and MongoDB Atlas. If you want to run a MongoDB Atlas sink connector in the same setting, your Atlas database must be located in the same region as the cloud provider for your Kafka cluster in Confluent Cloud. This prevents you from incurring data movement charges between cloud regions.
Learn more
If you haven’t tried it yet, check out Confluent Cloud, a fully managed event streaming service based on Apache Kafka.
Confluent Cloud is available on Microsoft Azure and Google Cloud, and AWS Marketplaces with the MongoDB Atlas source, sink, and other fully managed connectors. You can enjoy retrieving data from your data sources to Confluent Cloud and send Kafka records to your destinations without any operational burdens.
As previously mentioned, you can also use the promo code CL60BLOG for an additional $60 of free Confluent Cloud usage (details).
Join us for a live demo to learn how to get started.
Did you like this blog post? Share it now
Subscribe to the Confluent blog
New with Confluent Platform 7.9: Oracle XStream CDC Connector, Client-Side Field Level Encryption (EA), Confluent for VS Code, and More
This blog announces the general availability of Confluent Platform 7.9 and its latest key features: Oracle XStream CDC Connector, Client-Side Field Level Encryption (EA), Confluent for VS Code, and more.
Meet the Oracle XStream CDC Source Connector
Confluent's new Oracle XStream CDC Premium Connector delivers enterprise-grade performance with 2-3x throughput improvement over traditional approaches, eliminates costly Oracle GoldenGate licensing requirements, and seamlessly integrates with 120+ connectors...

